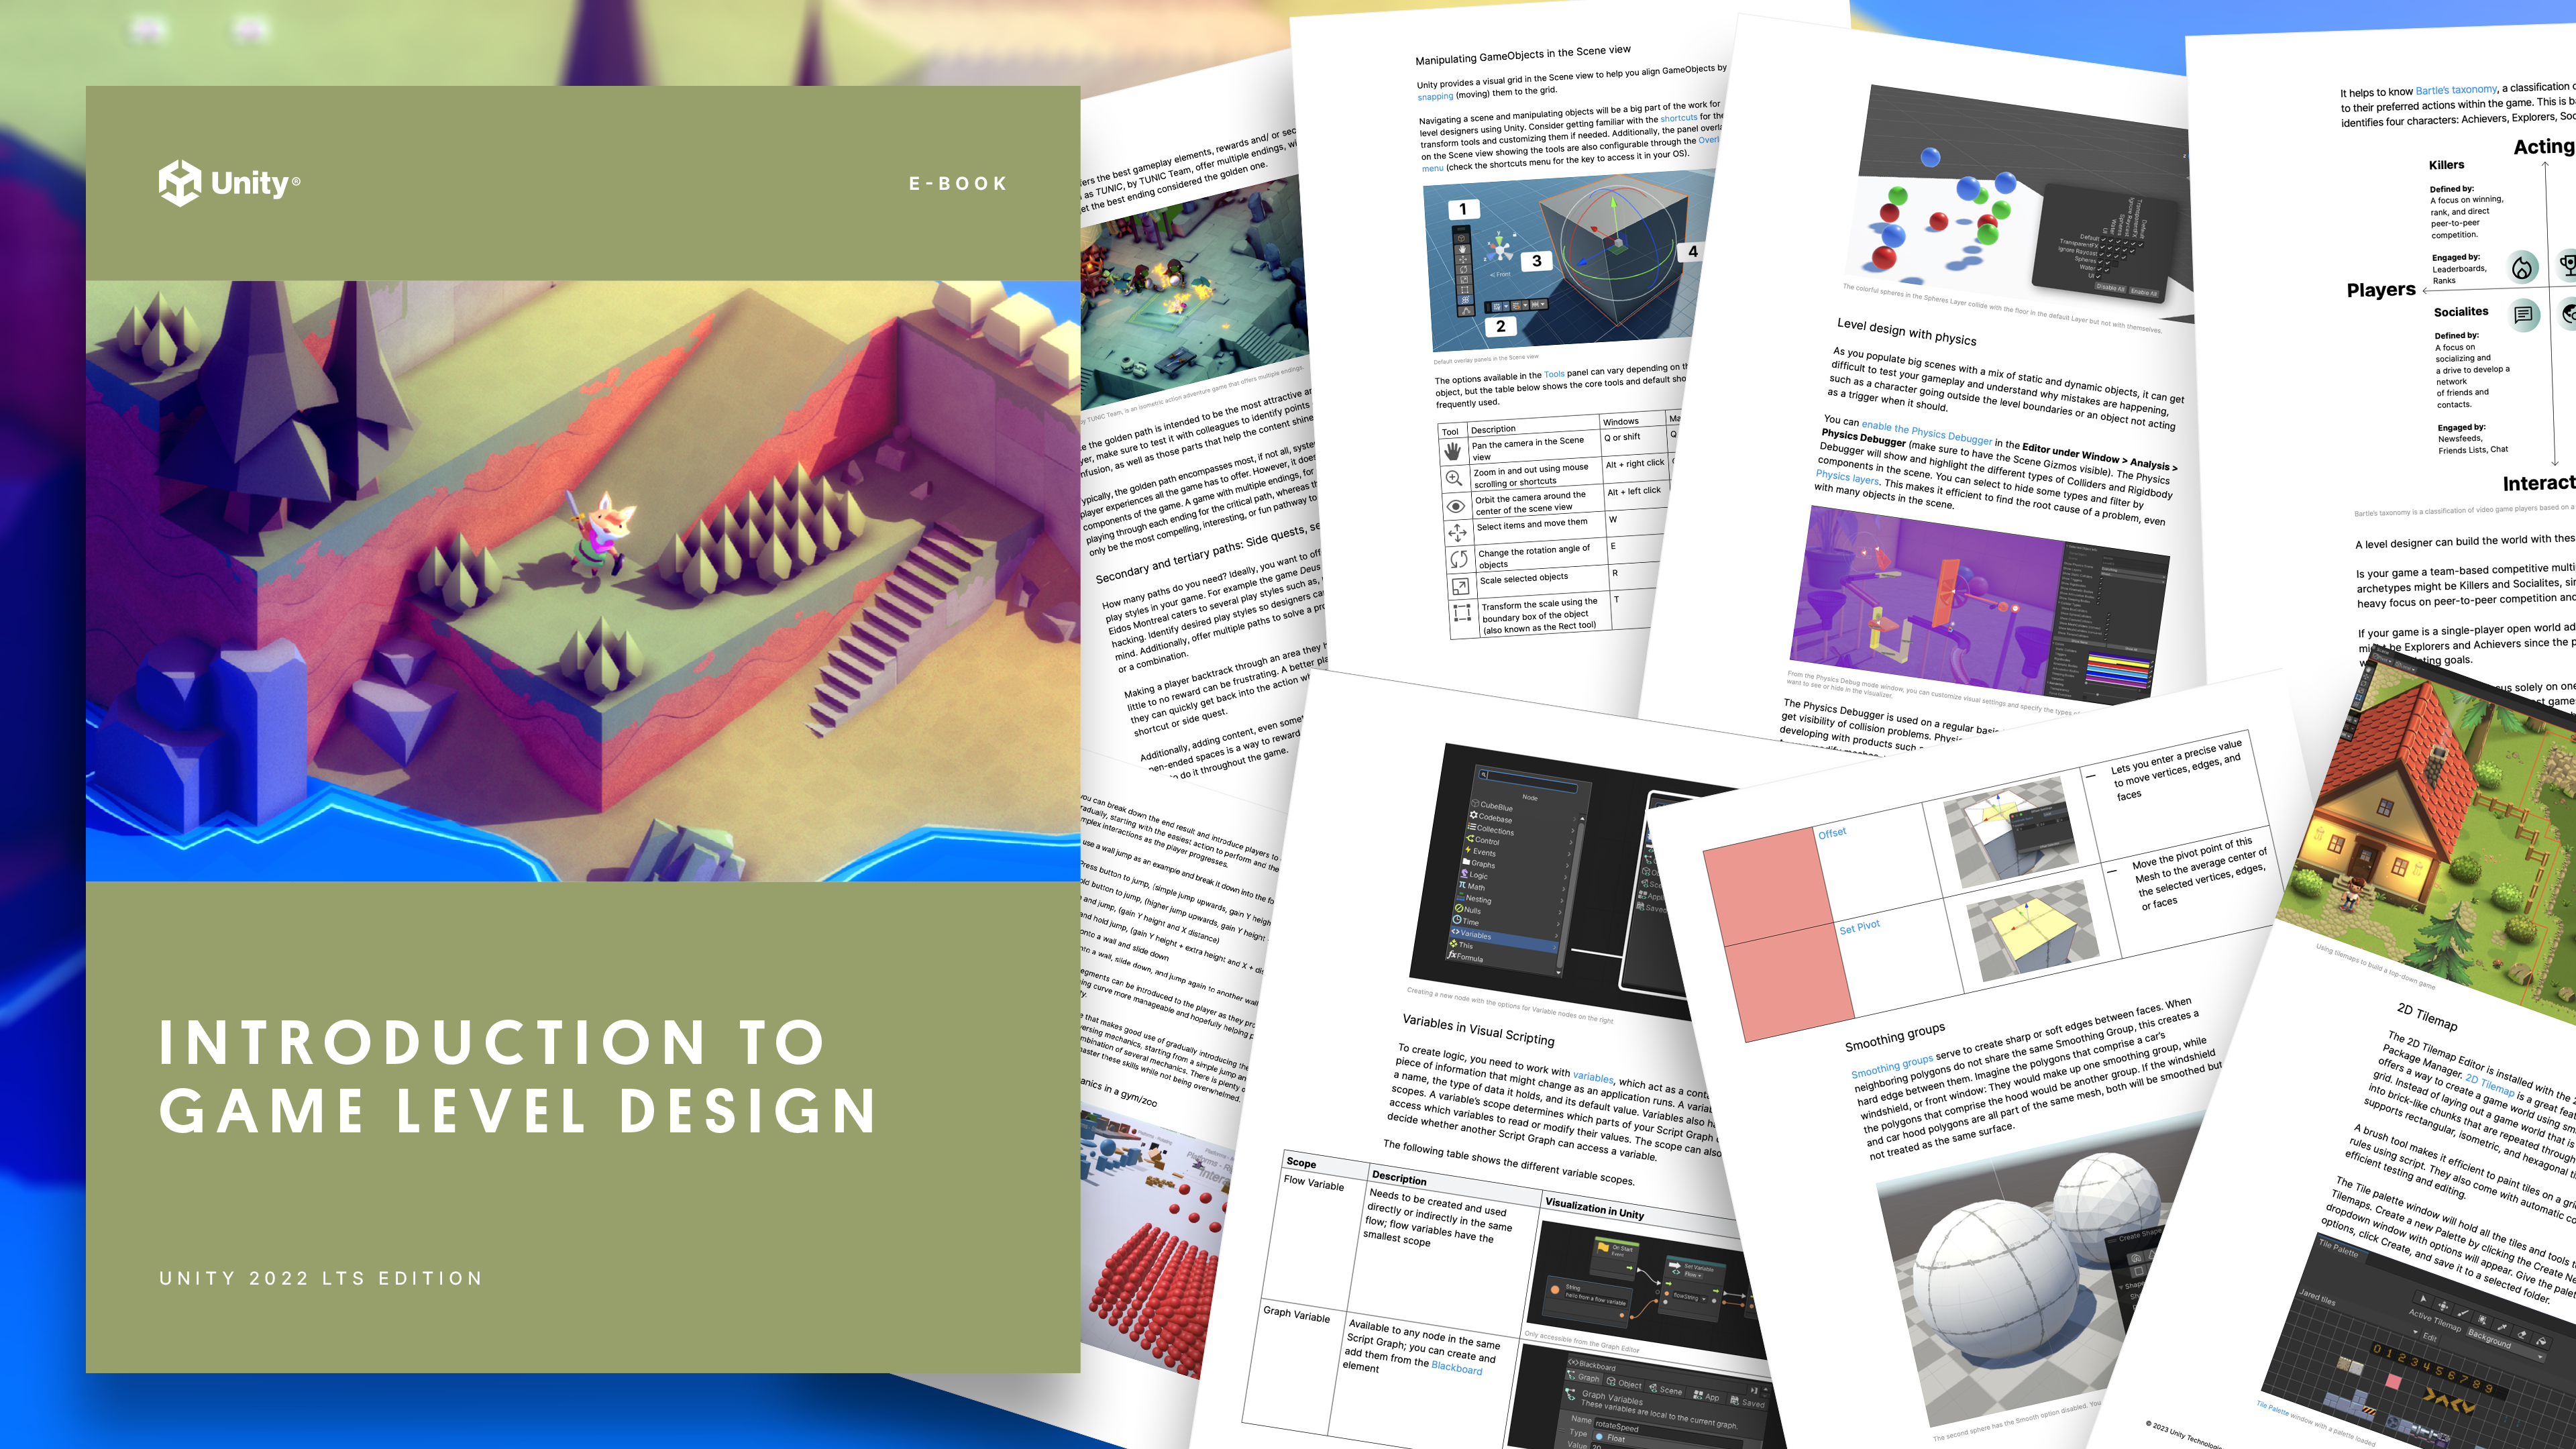
Our first-ever e-book for level designers is here


Level designers are the storytellers and master builders in game development, who, together with game designers, provide the script or blueprint for a game. They wear multiple hats and use multiple media, from paper and physical building blocks to prototyping ideas onscreen.
We’re happy to announce that our first ever e-book for level designers is now available. Introduction to game level design is filled with work and career tips, and instructions on how to use the Unity tools that are most relevant to worldbuilding. It’s written by professional level designers working in the games industry and Unity product experts with backgrounds in game and level design.
Design tips and a deep dive into Unity tools

There are three sections in the guide. Stefan Horvath and Christo Nobbs, professional level designers with over a decade of experience in the games industry, wrote Part I. It details the responsibilities and workflows of a level designer in the preproduction and production stages of game development.
Among other things, they explain how to:
- Prepare for game development with a research and references document
- Incorporate the main camera, character, and the game controls into level designs
- Test ideas in a “gym” or “zoo”
- Set the pacing and gameplay beats
- Block out levels with 3D assets and keep assets organized for testing and iteration
- Organize gameplay around “player pathing”
- Subvert players’ expectations and keep their attention
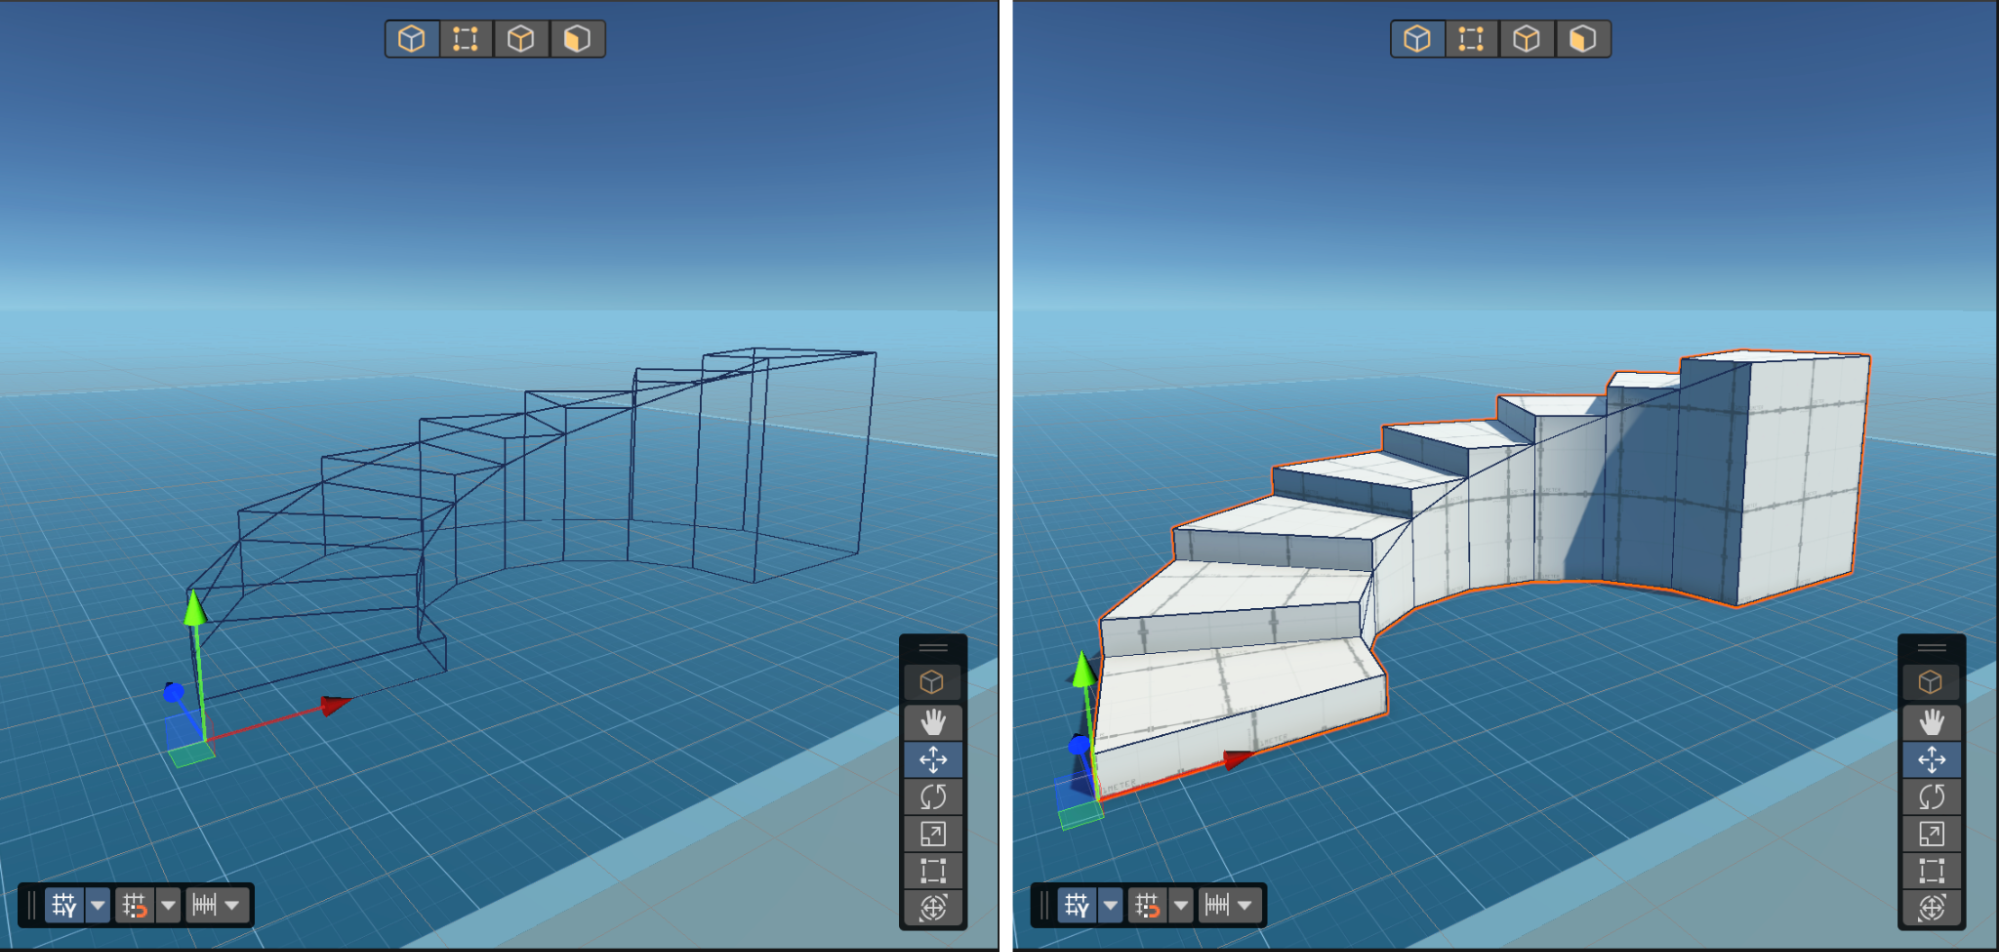
- Consider using procedural design for large environments
Part II is written for level designers who have little or no experience with Unity but are interested in learning how to use it. This section covers tools like Unity Visual Scripting, the Physics and Animation systems, and offers an introduction to the Unity Asset Store.

Part III takes a deep dive into design tools, like ProBuilder and the Terrain system, that designers can use to create high-quality prototypes of levels to share with colleagues and stakeholders.
Continue scrolling to read excerpts from Part I on how to effectively white/grey-box design ideas, and Part III, about some of the tools available in ProBuilder for blocking out designs.
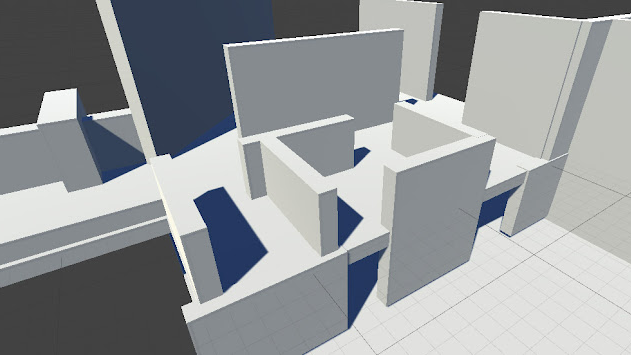
Blocking out your level (from Part I)
White-boxing (also called grey-boxing) is creating and arranging simple 3D shapes to identify which layout best suits the level design and style you’re aiming for.
Keeping the white box simple allows you to manipulate the level without having to adjust art, lighting, and other details, resulting in a faster iteration process.
Some level designers prefer to jump directly into white-boxing instead of creating paper designs first, since they like to work in the 3D space and get used to the game engine workflows. It’s up to you to determine which approach works best for you.

Give descriptive names to blocky assets
Give each blocky asset a descriptive name to identify its use. This helps environment artists to understand what your intention is for each object when they need to replace them with the actual game assets.
For example, is a block a wall, and, if so, does it need to have a minimum height to block the player’s view? A name for this asset could be “wall_interior_w2_h4_l6.” This label identifies the object, its location, and its measurements, details that are important to pass on to artists. Consistent formatting of your names will also make it easier for colleagues to understand their meaning.

For ease of access, you can also choose to use floating text in the 3D space to identify your intentions, allowing a colleague to run a build without Editor access and see your plan.
Finally, labeling your assets is not only useful for others looking at your scene, it’s also useful for you since it will help you keep track of what you’re working on.
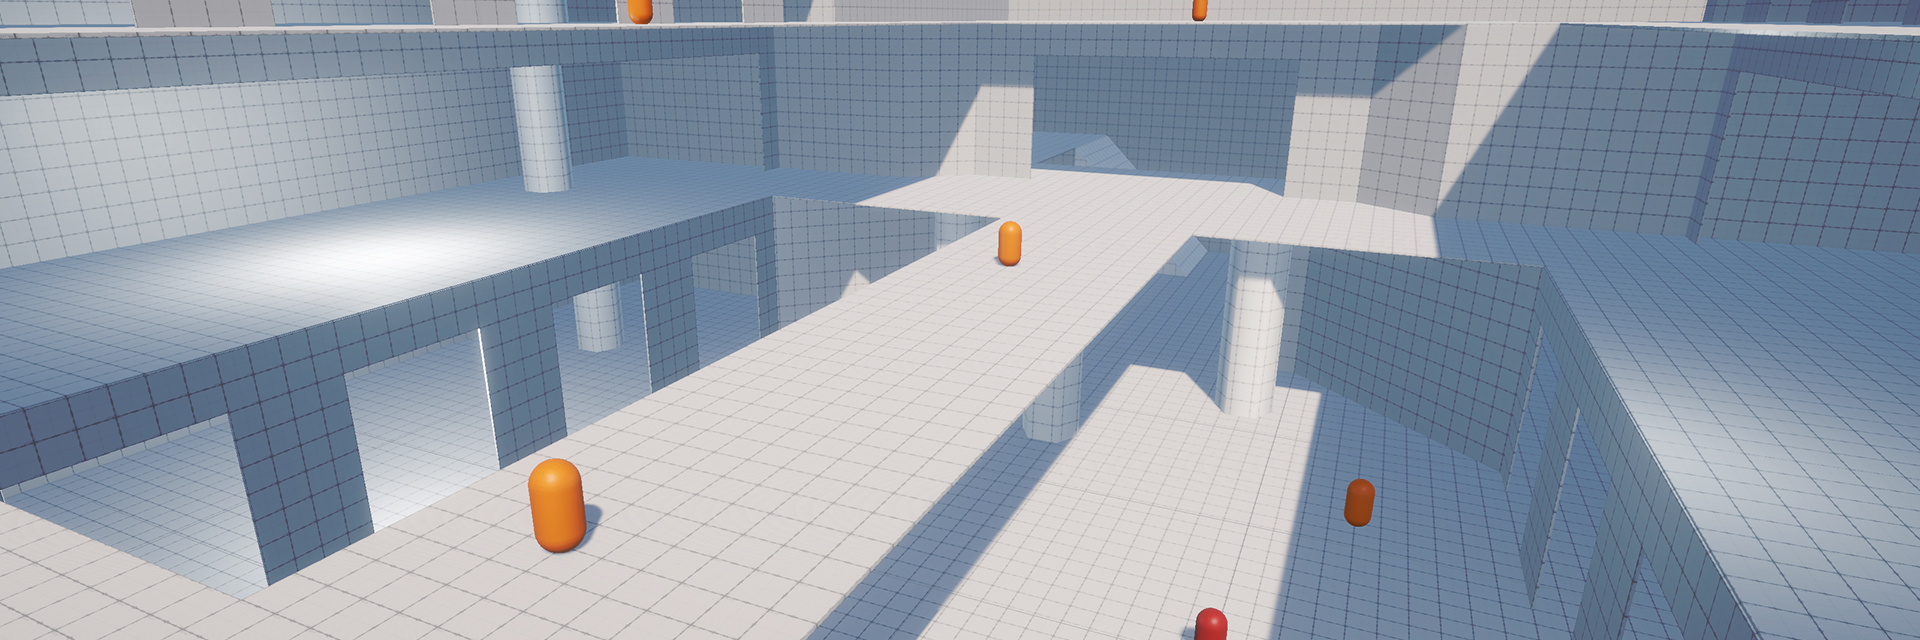
Add Materials to blocky assets to visualize your intention
In addition to giving assets descriptive names, you can also apply materials to your blocks to clarify your intention. This is a handy way to differentiate between interactive and static objects, playable and non-playable space, breakables and non-breakables, and so on.
Avoid creating detailed art assets
The point of white-boxing is to try out ideas and iterate on them. To avoid spending time updating assets that are not finalized, your team should not create 3D assets until the designs have been approved.
Once you have buy-in from other relevant team members and are satisfied with your level design, the artists can start going through the level and adding 3D assets to replace the white boxes.
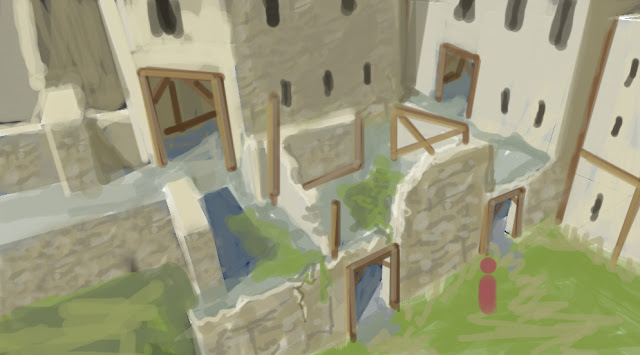
Ask a concept artist for help
Team members might have trouble visualizing the final result from a white-boxed scene. A concept artist can help you concretize your vision by performing a paintover on your whitebox. This is a 2D representation of the level, so there’s no need to create 3D assets. Typically, paintovers are done by taking a screenshot of the level and then painting it to show a style and mood.
You can also share the actual scene with a concept artist. If you’ve documented what each of the blocks represents, it will be easier for the concept artist to adhere to your overall vision.


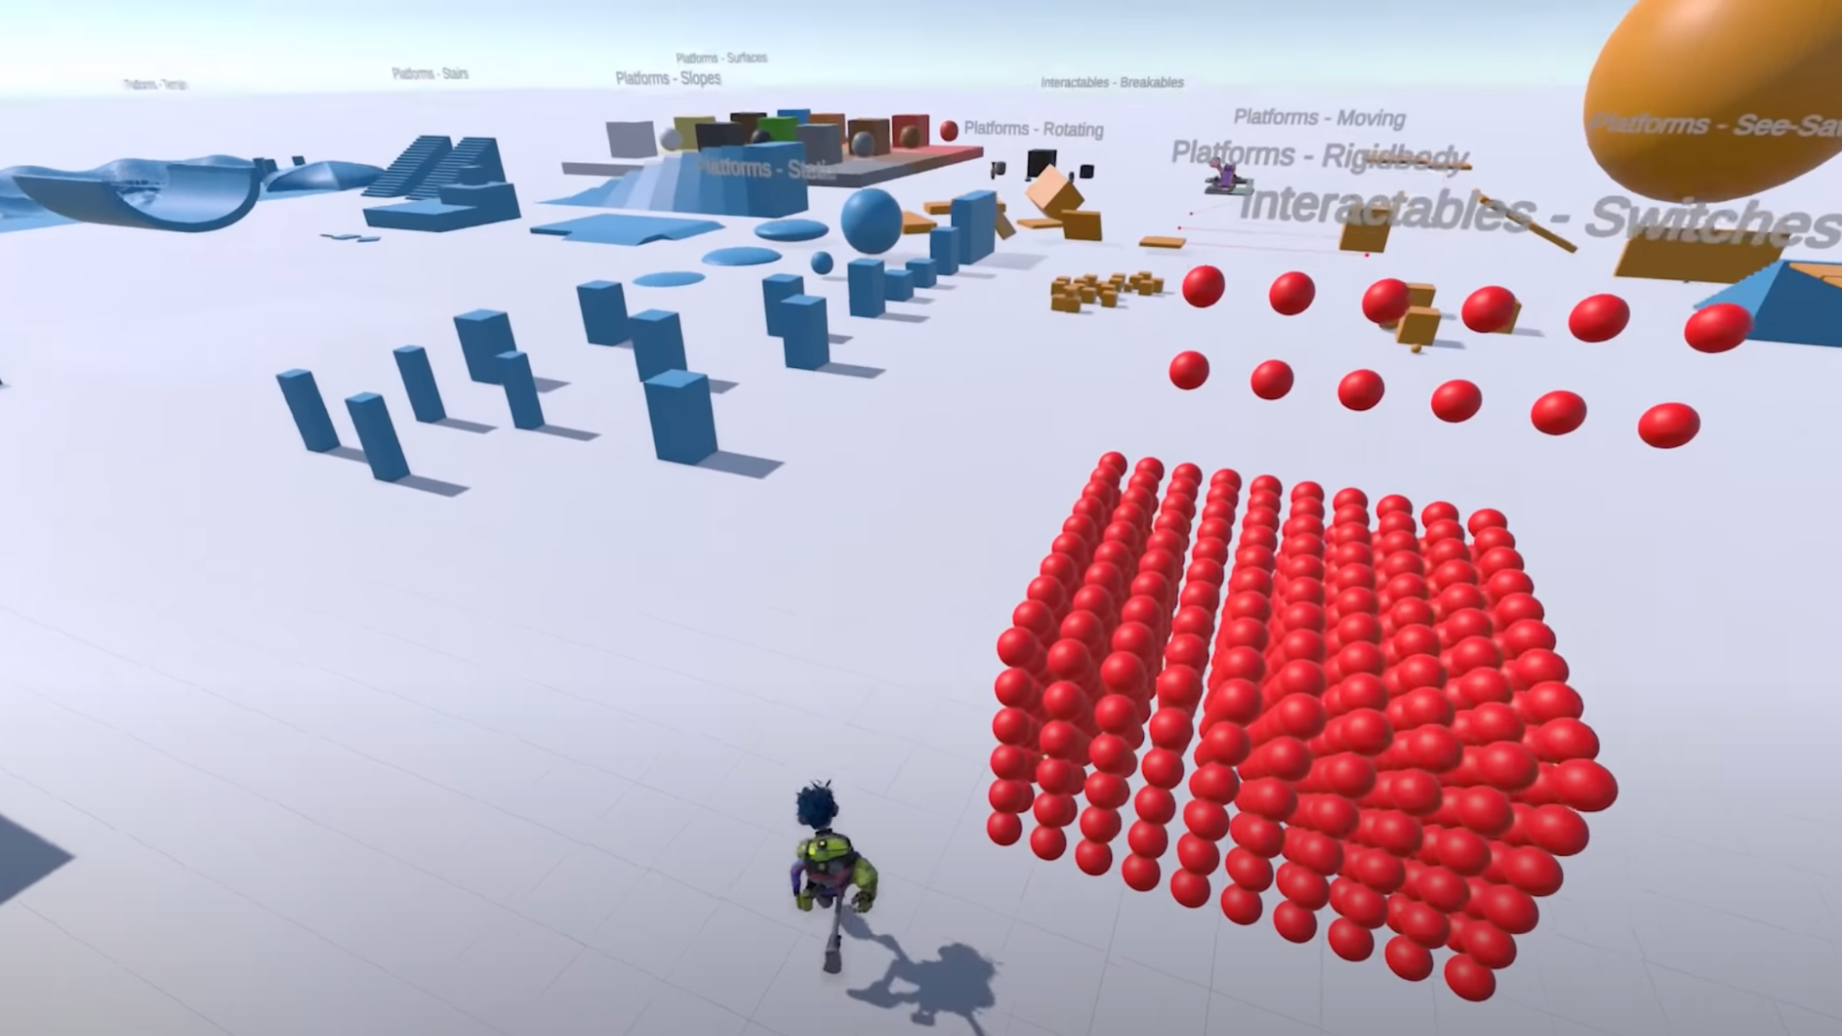
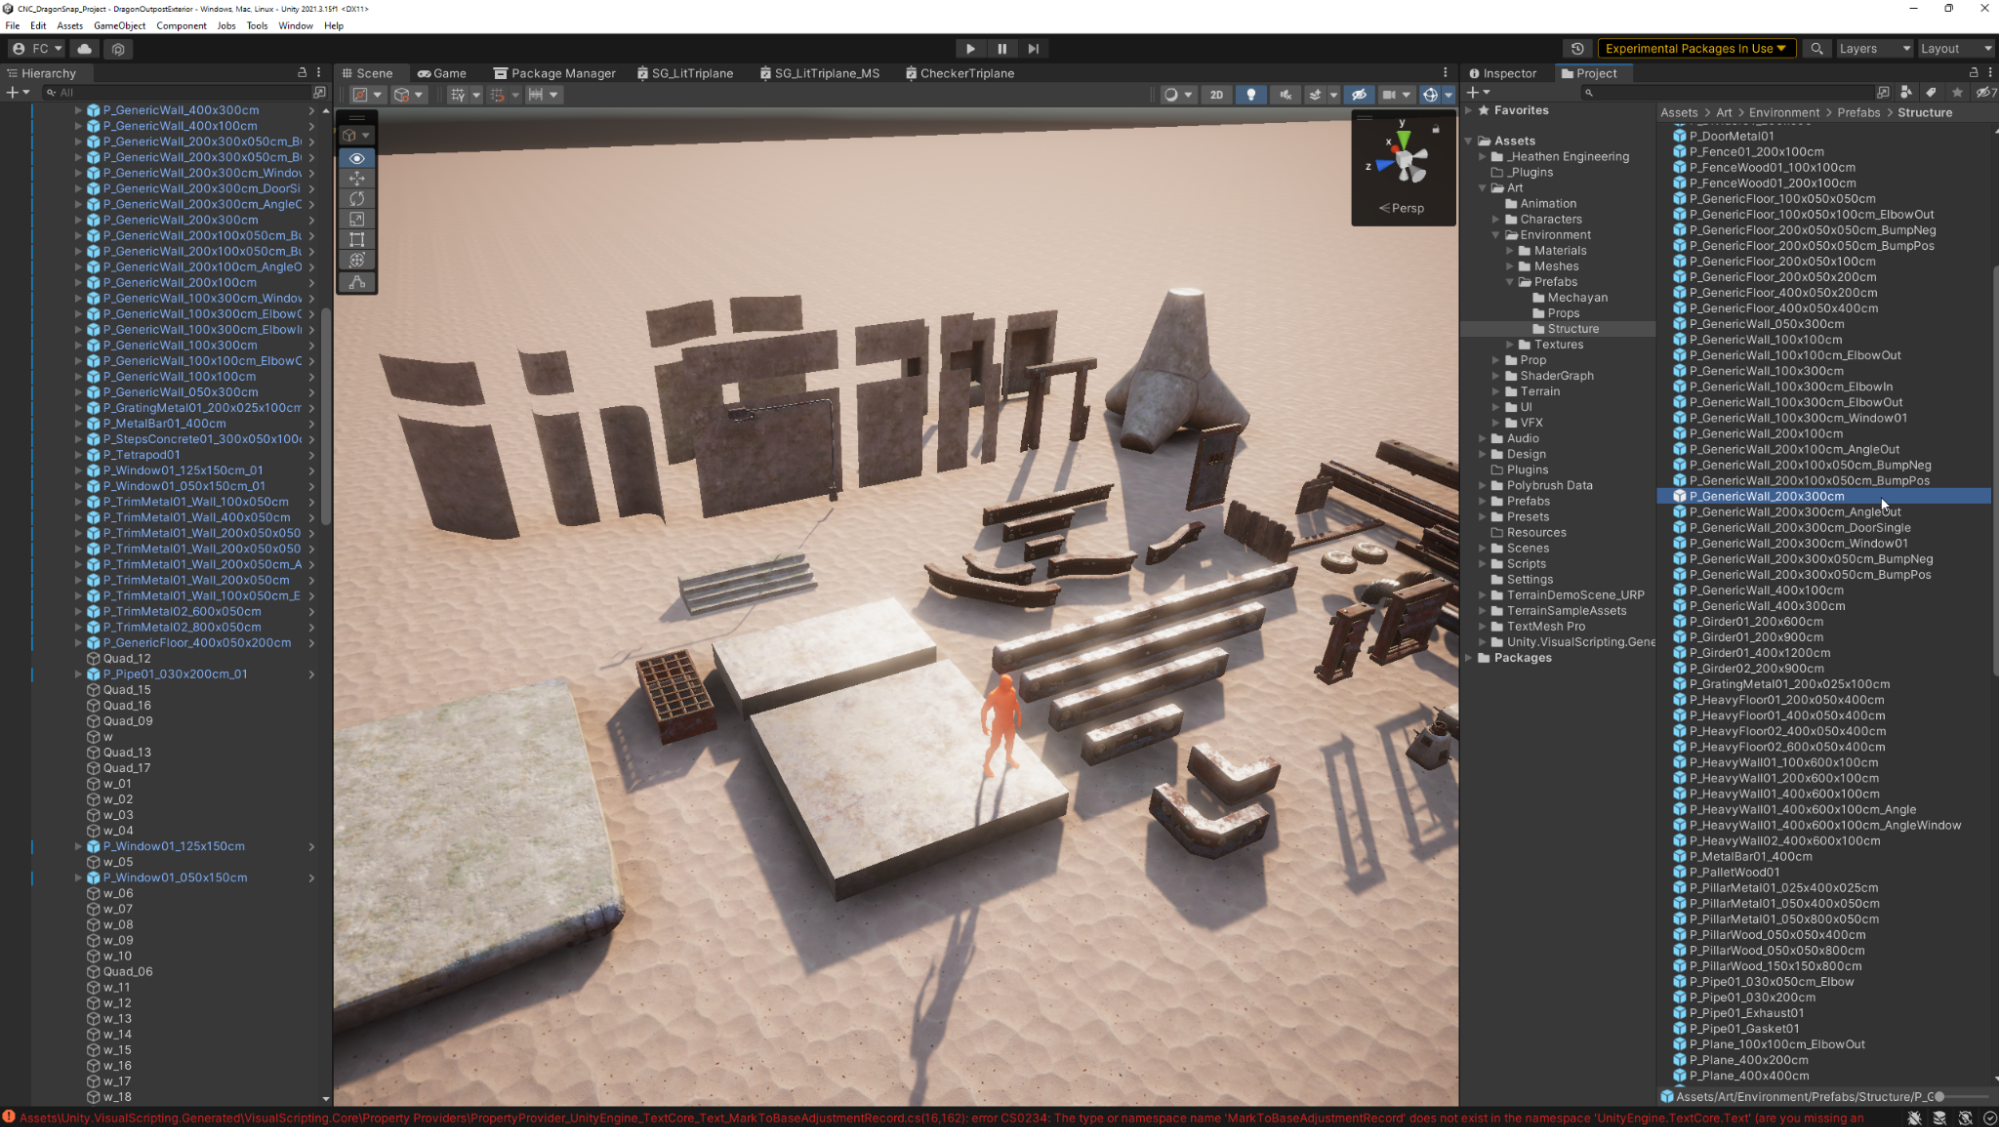
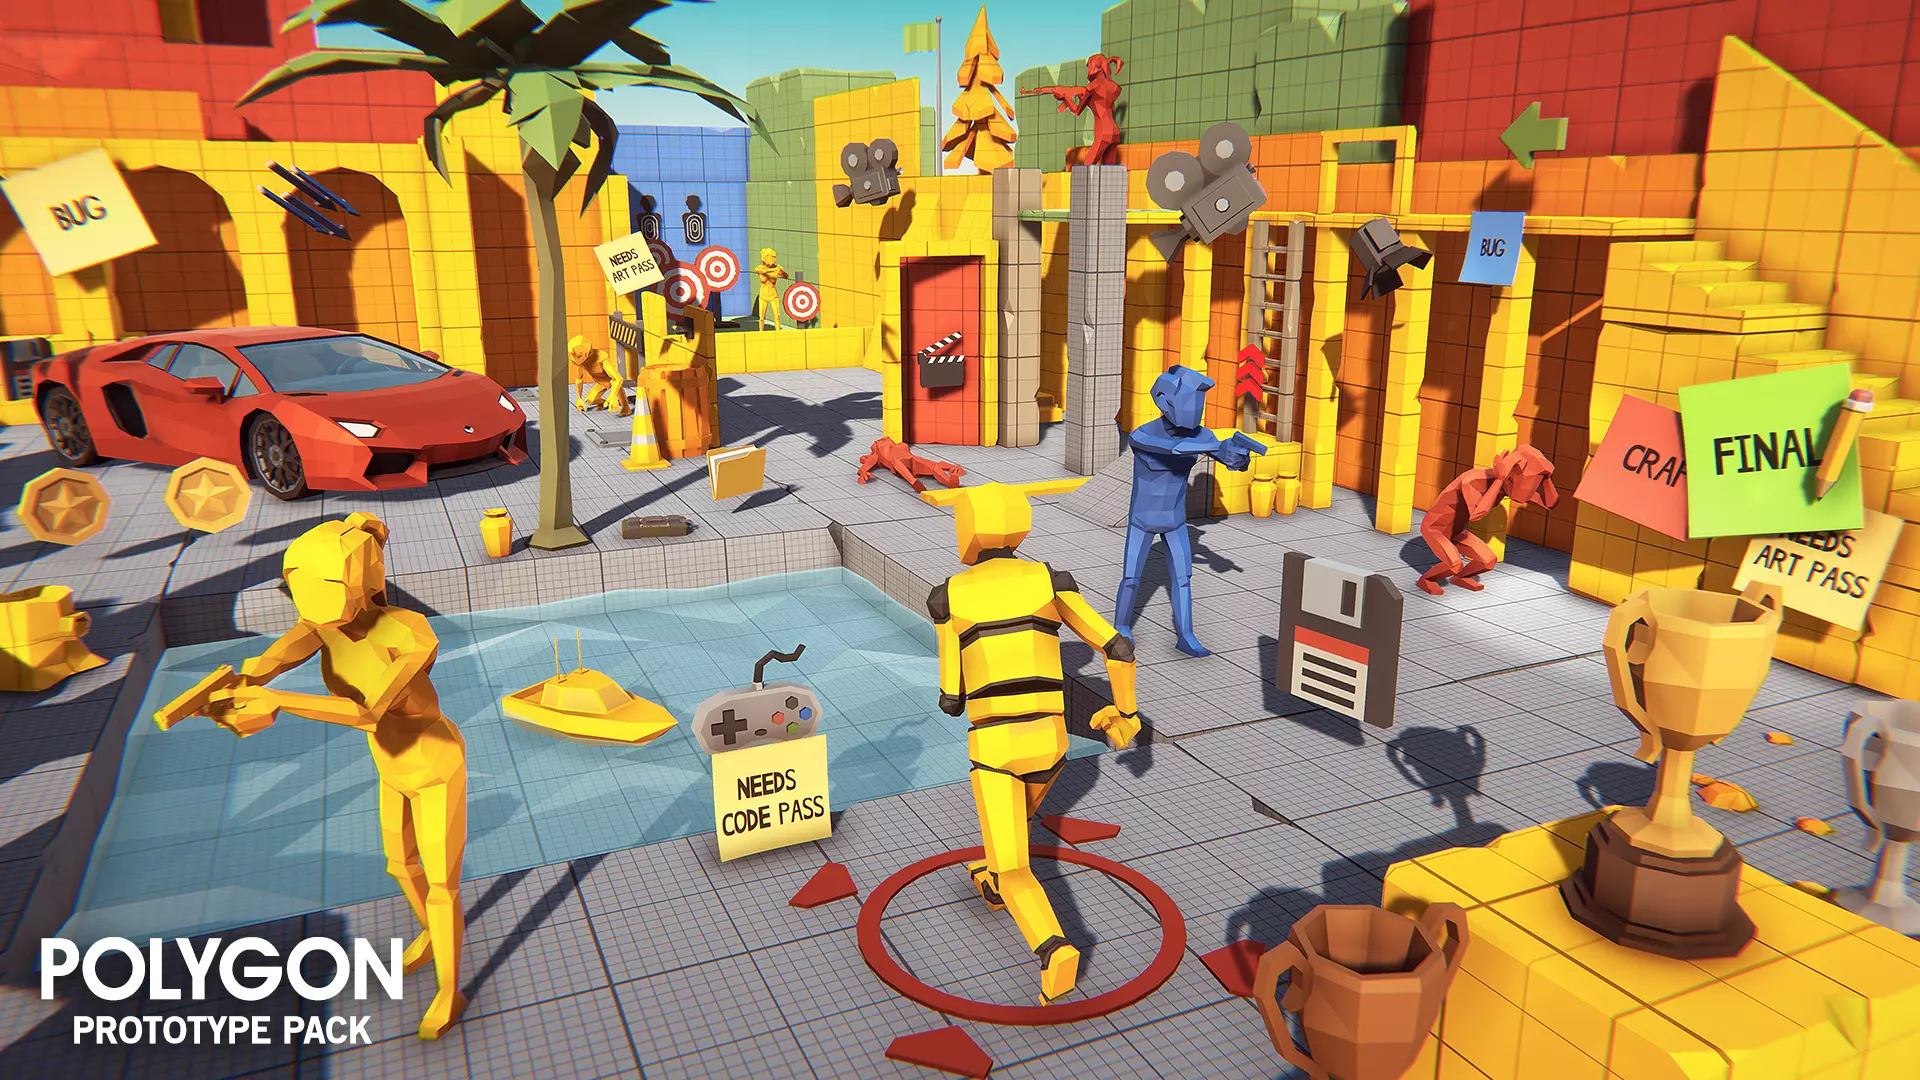
Ready-made assets can also help
Another efficient way to amplify your white-box scene is to drop ready-made assets into it.
The Unity Asset Store has many ready-to-use assets to visualize your ideas. For example, the POLYGON Prototype Pack from Synty Studios will help you “communicate design decisions with your team using the included notes and markers.”

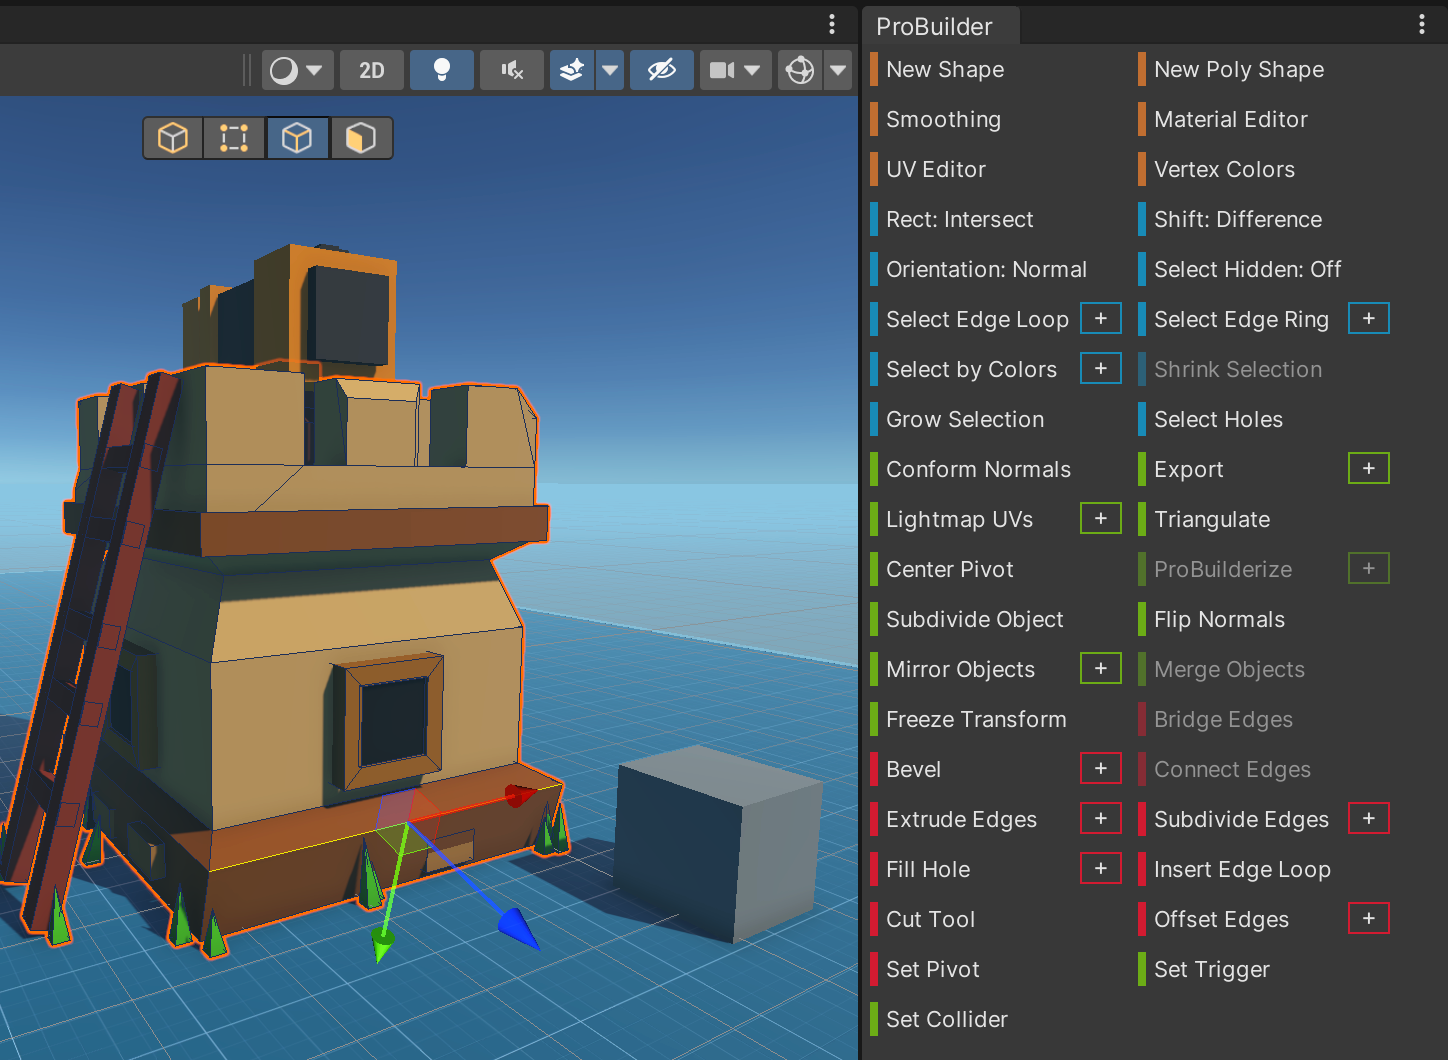
Get started with blocking out levels in ProBuilder (from Part III)

ProBuilder enables you to design, grey-box, prototype, and playtest levels in Unity without 3D modeling software or professional 3D artists. It provides many tools for creating and manipulating objects, including smoothing, stretching, flipping, mirroring, extruding, dividing, coloring, and texturing objects.
The e-book includes detailed tables listing each tool and how to use it. This excerpt includes the introduction to ProBuilder and a few of these tools.

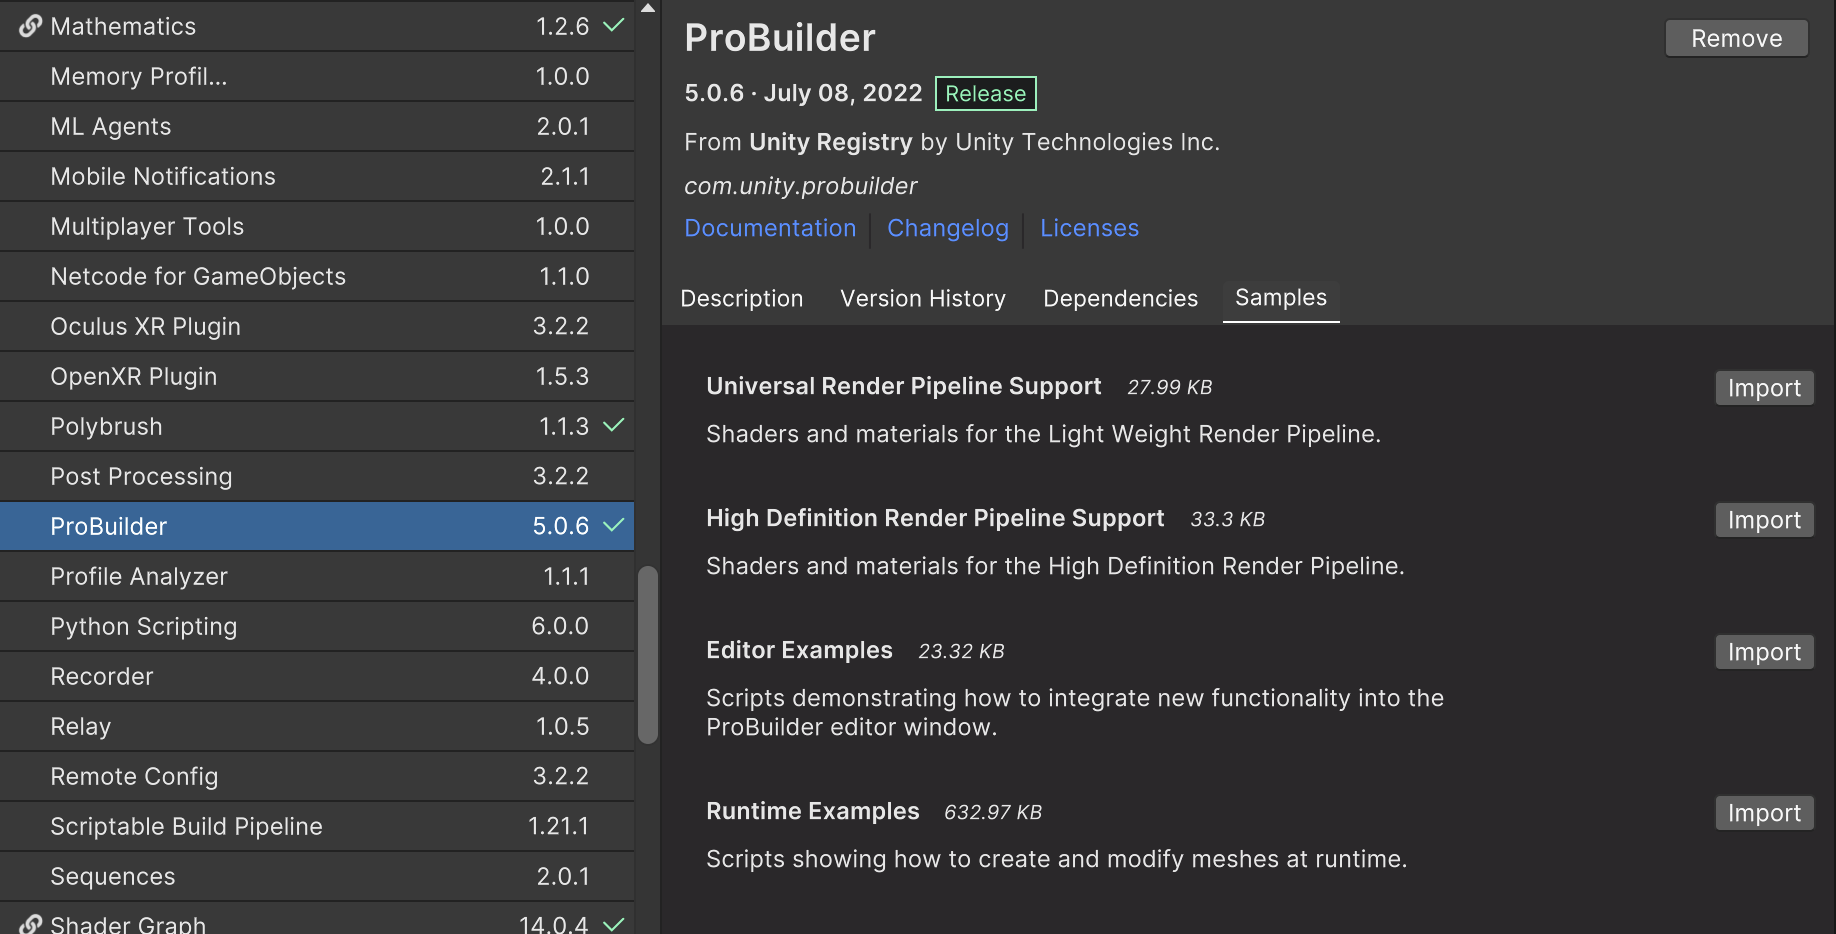
When you install the ProBuilder package, make sure to import the support files (materials) that correspond to either the Universal Render Pipeline (URP) or High Definition Render Pipeline (HDRP). Otherwise, the objects might not be rendered. If you use the Built-in Render Pipeline, no action is needed.

Create a ProBuilder primitive object from the top menu via GameObject > ProBuilder > Cube (for example). ProBuilder includes a number of primitive shapes that are useful for quick prototyping. These shapes, which also come with a Mesh Collider component for physics, can be added in the Scene view.
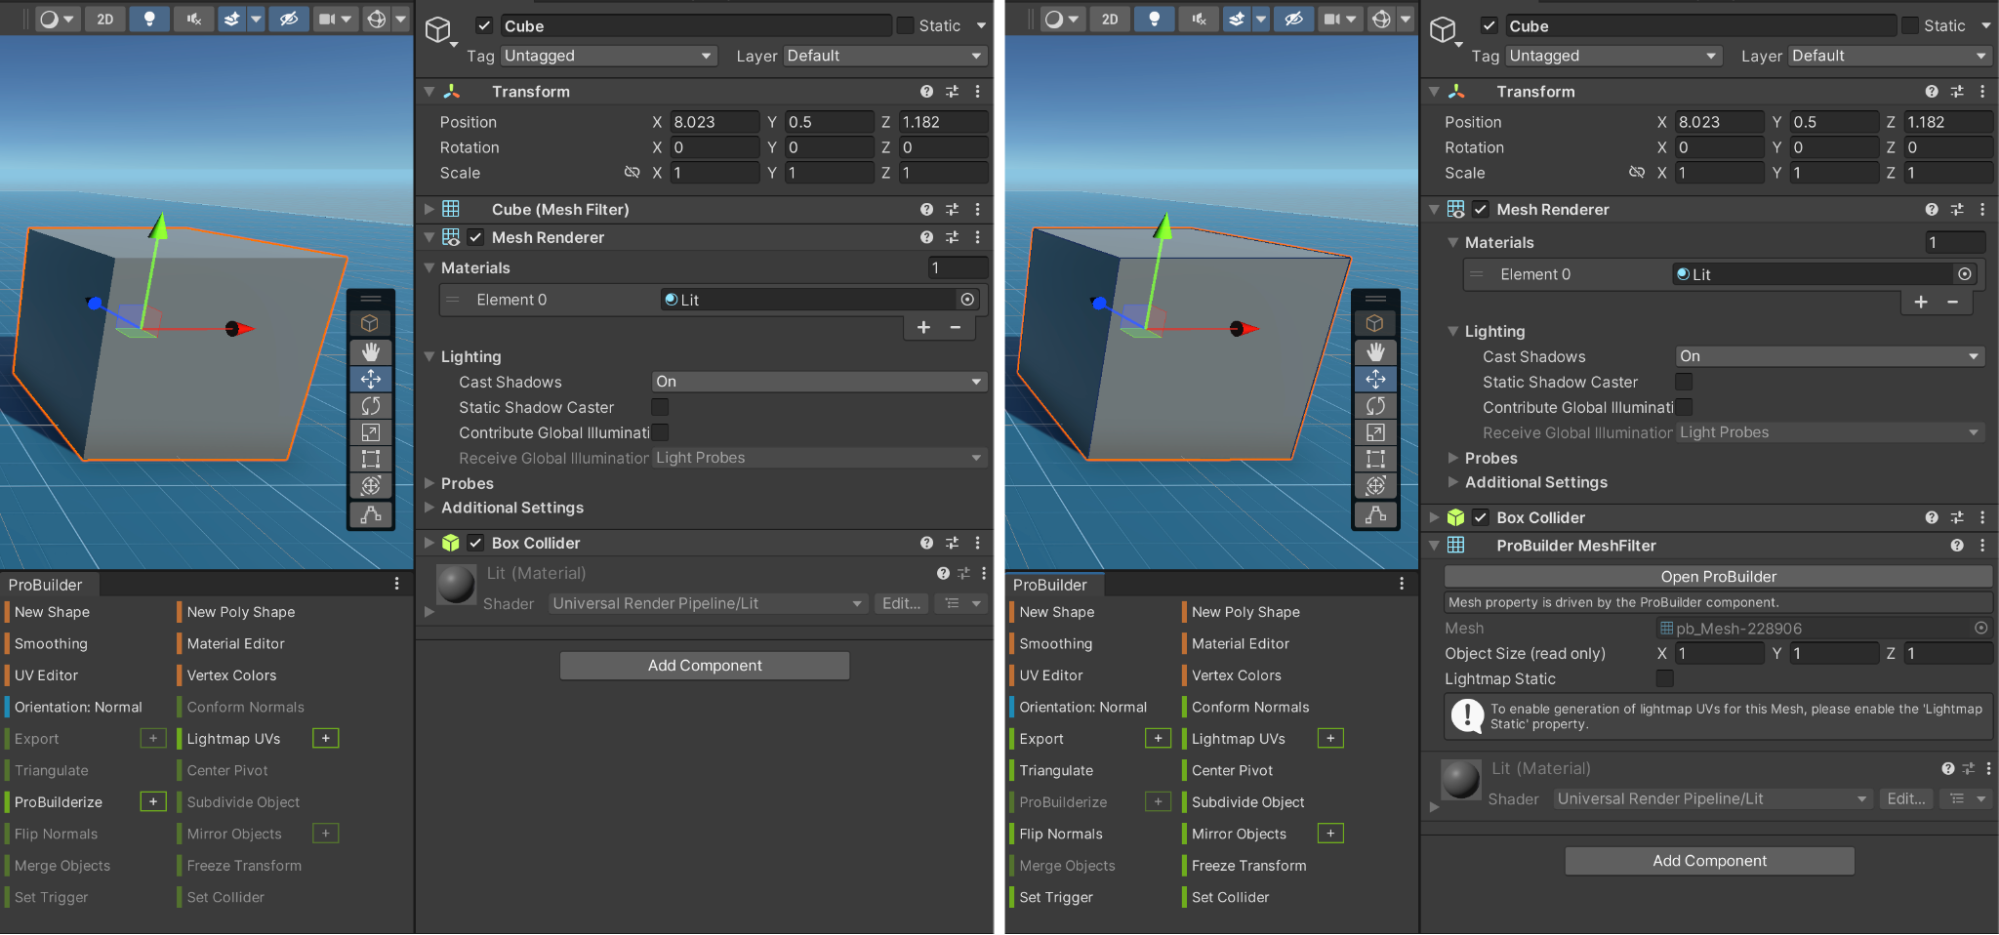
ProBuilder meshes act like regular GameObjects in Unity. You can apply Transform values, add components, physics, and scripts, and animate them. However, standard Unity meshes are not the same as ProBuilder meshes: You can’t edit them with ProBuilder until you convert them into ProBuilder objects.

Although it’s common to build a ProBuilder mesh by creating and editing it entirely with ProBuilder tools and actions, it can also be useful to modify existing assets. For example, you can import assets from the Unity Asset Store and modify them with ProBuilder.

Smoothing groups
Smoothing groups serve to create sharp or soft edges between faces. When neighboring polygons do not share the same smoothing group, this creates a hard edge between them. Imagine the polygons that comprise a car’s windshield, or front window: They would make up one smoothing group, while the polygons that comprise the hood would be another. If the windshield and car hood polygons are all part of the same mesh, both will be smoothed but not treated as the same surface.

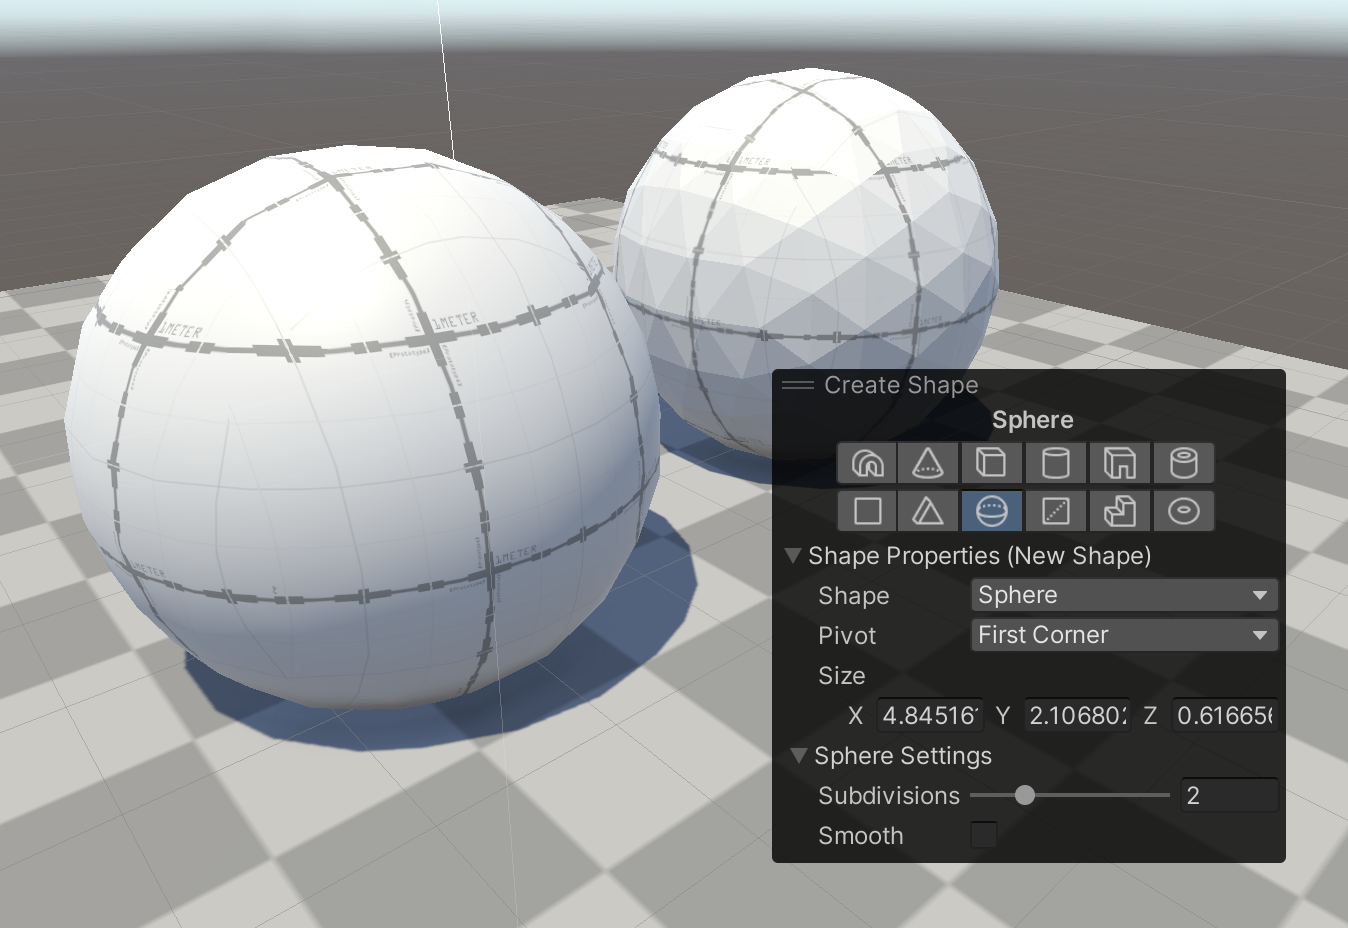
In ProBuilder, new shapes have all faces smoothened by default. For more control with smoothing groups, uncheck the Smoothing option (as shown in the image above).
The Smooth Group Editor Window offers options to help you set up and previsualize the different smoothing groups.

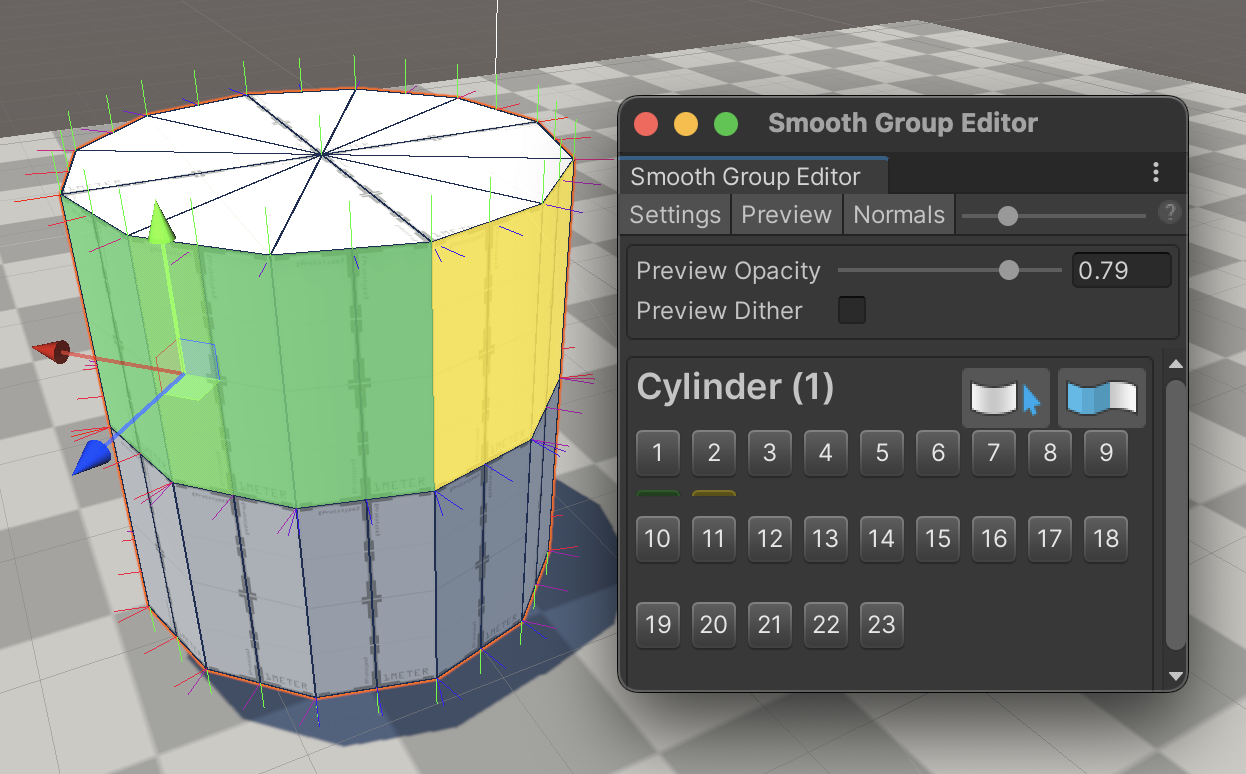
With the Preview option, you can adjust the transparency of the color code of the faces by smoothing group, and blend them in with a dither effect. You can also previsualize the normals of the vertices.
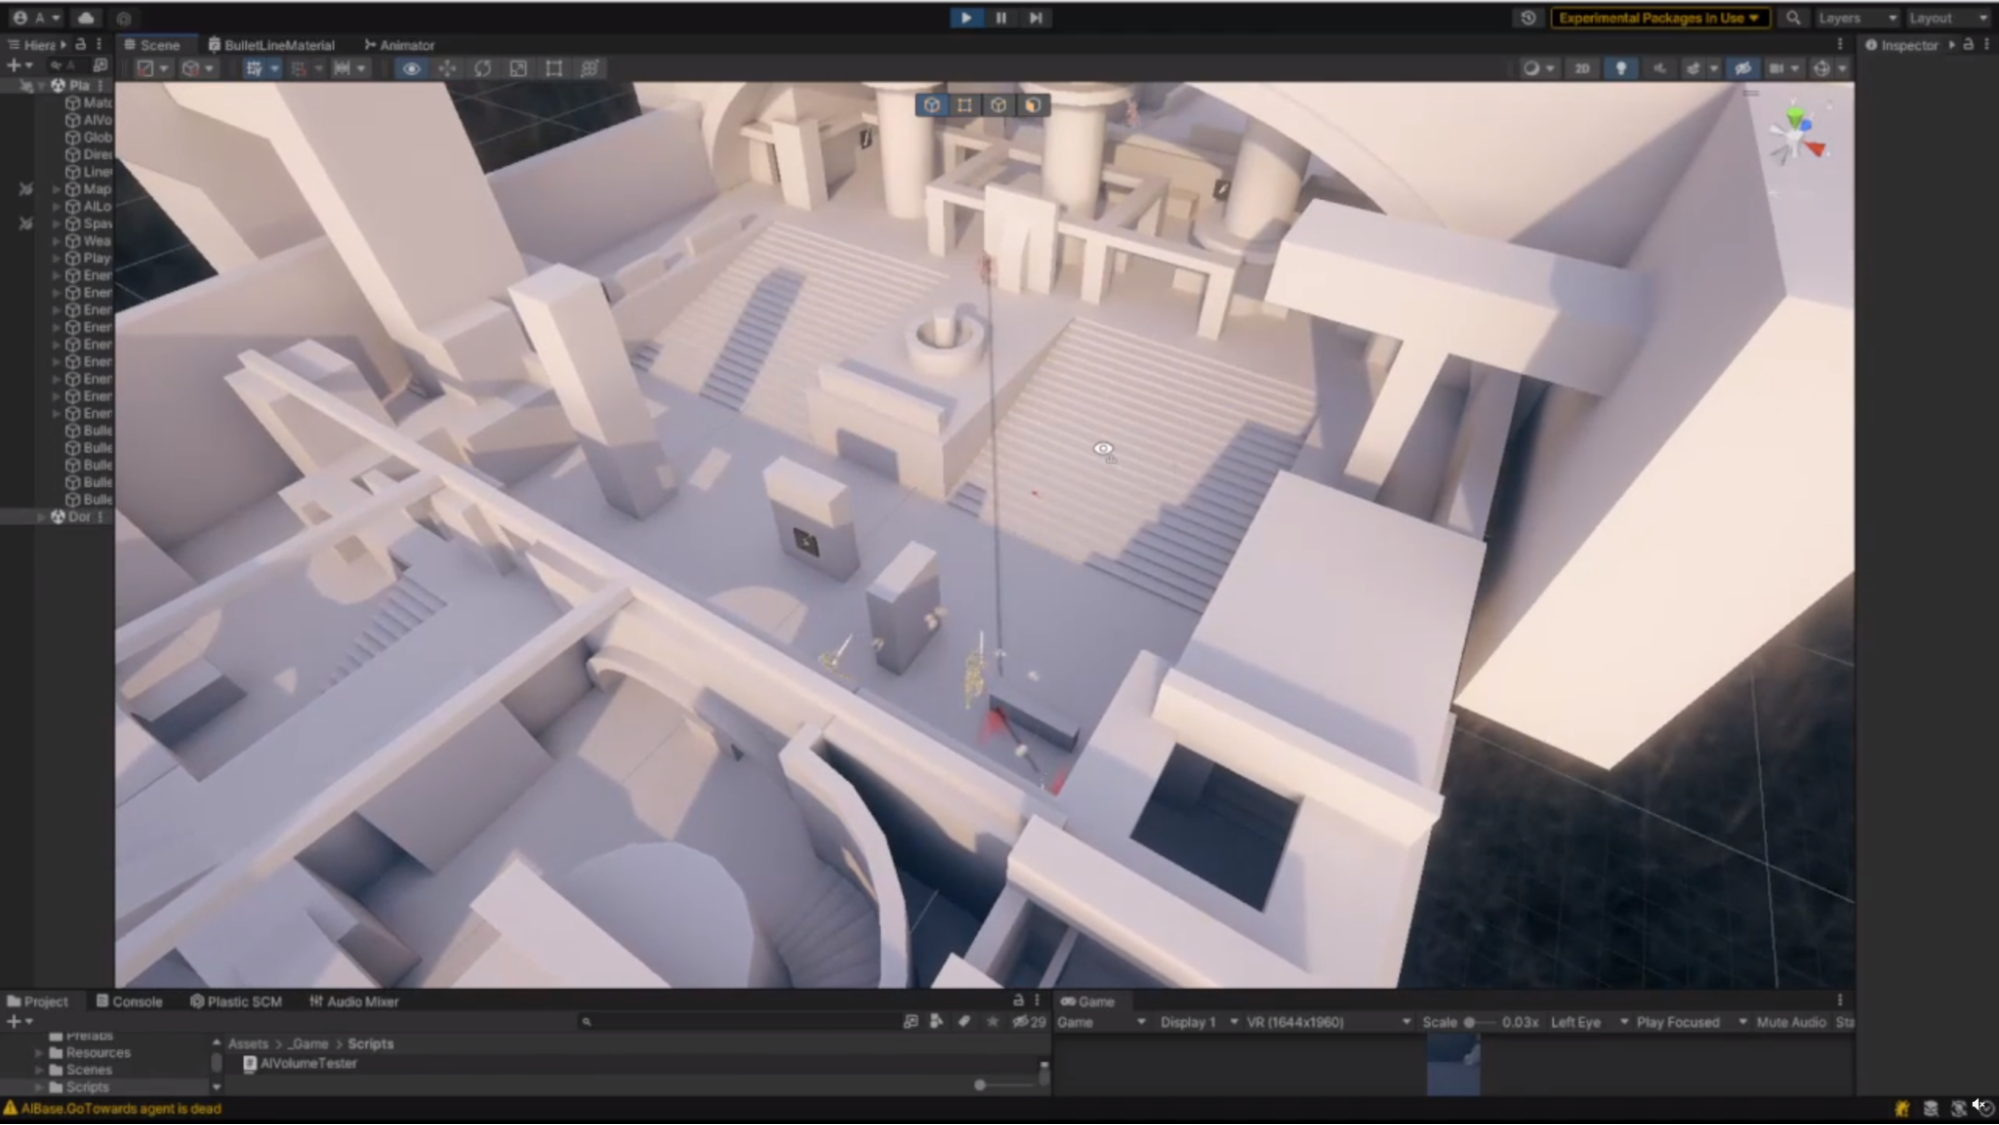
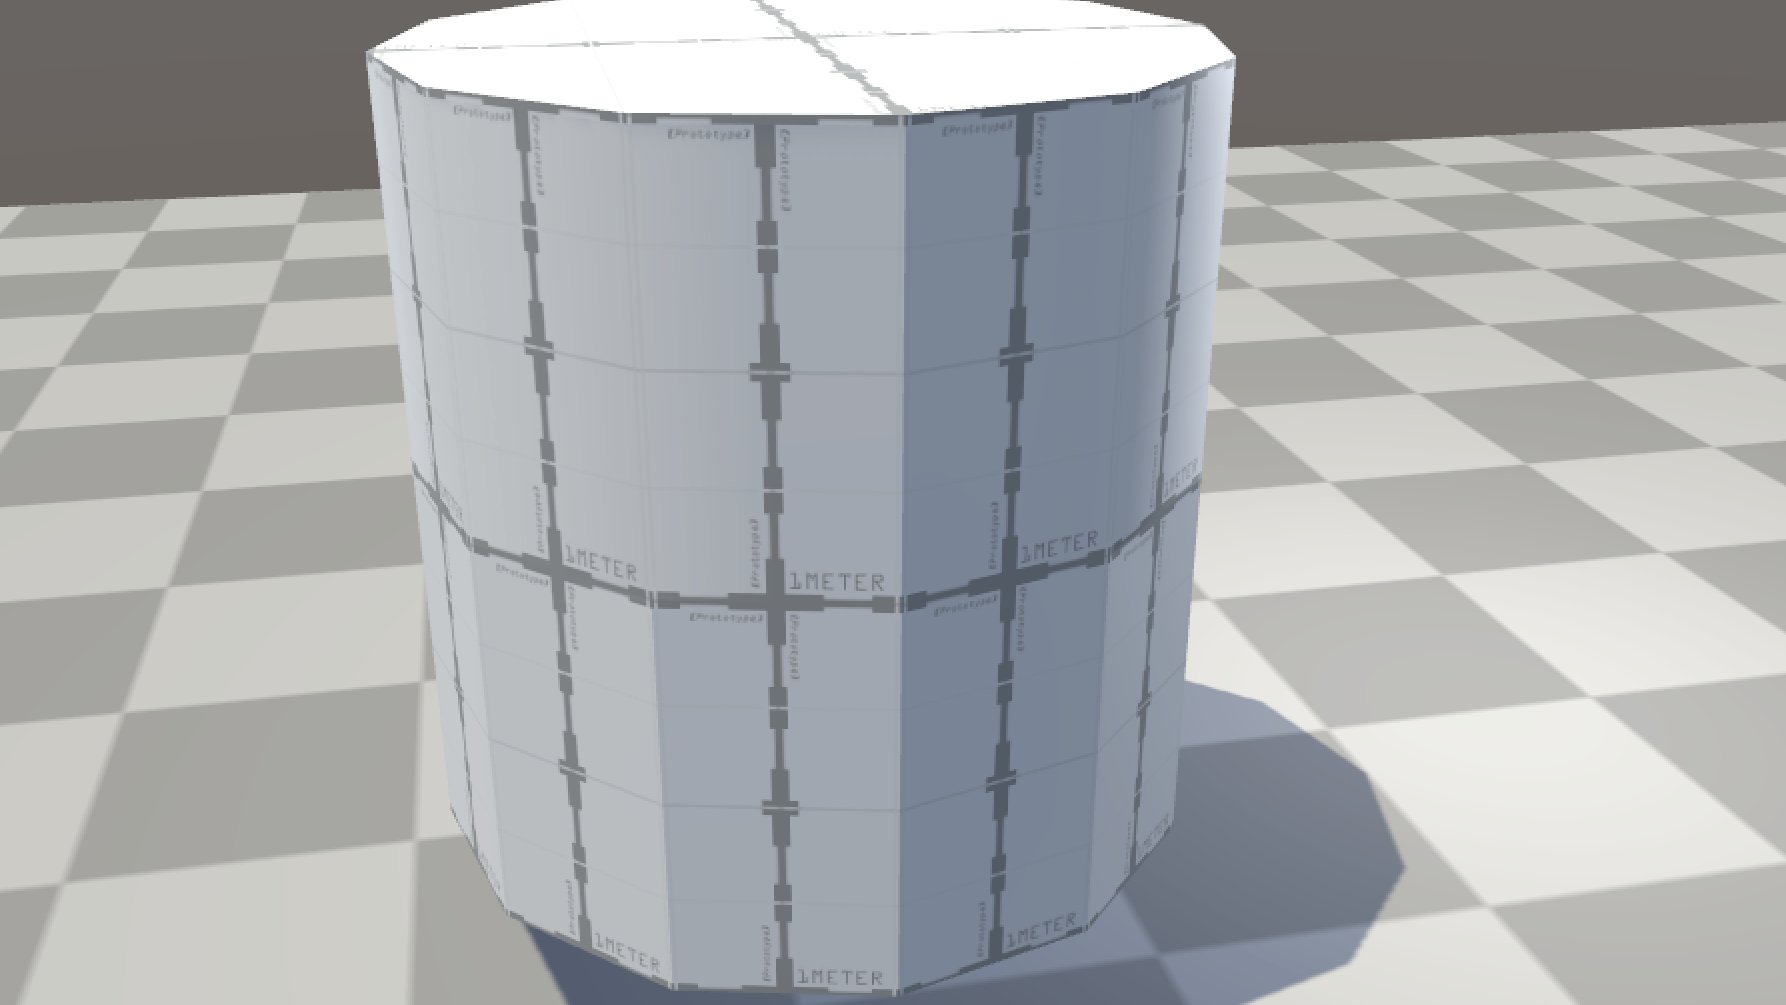
The previous example looks like the following in the Game view:

UV Editor

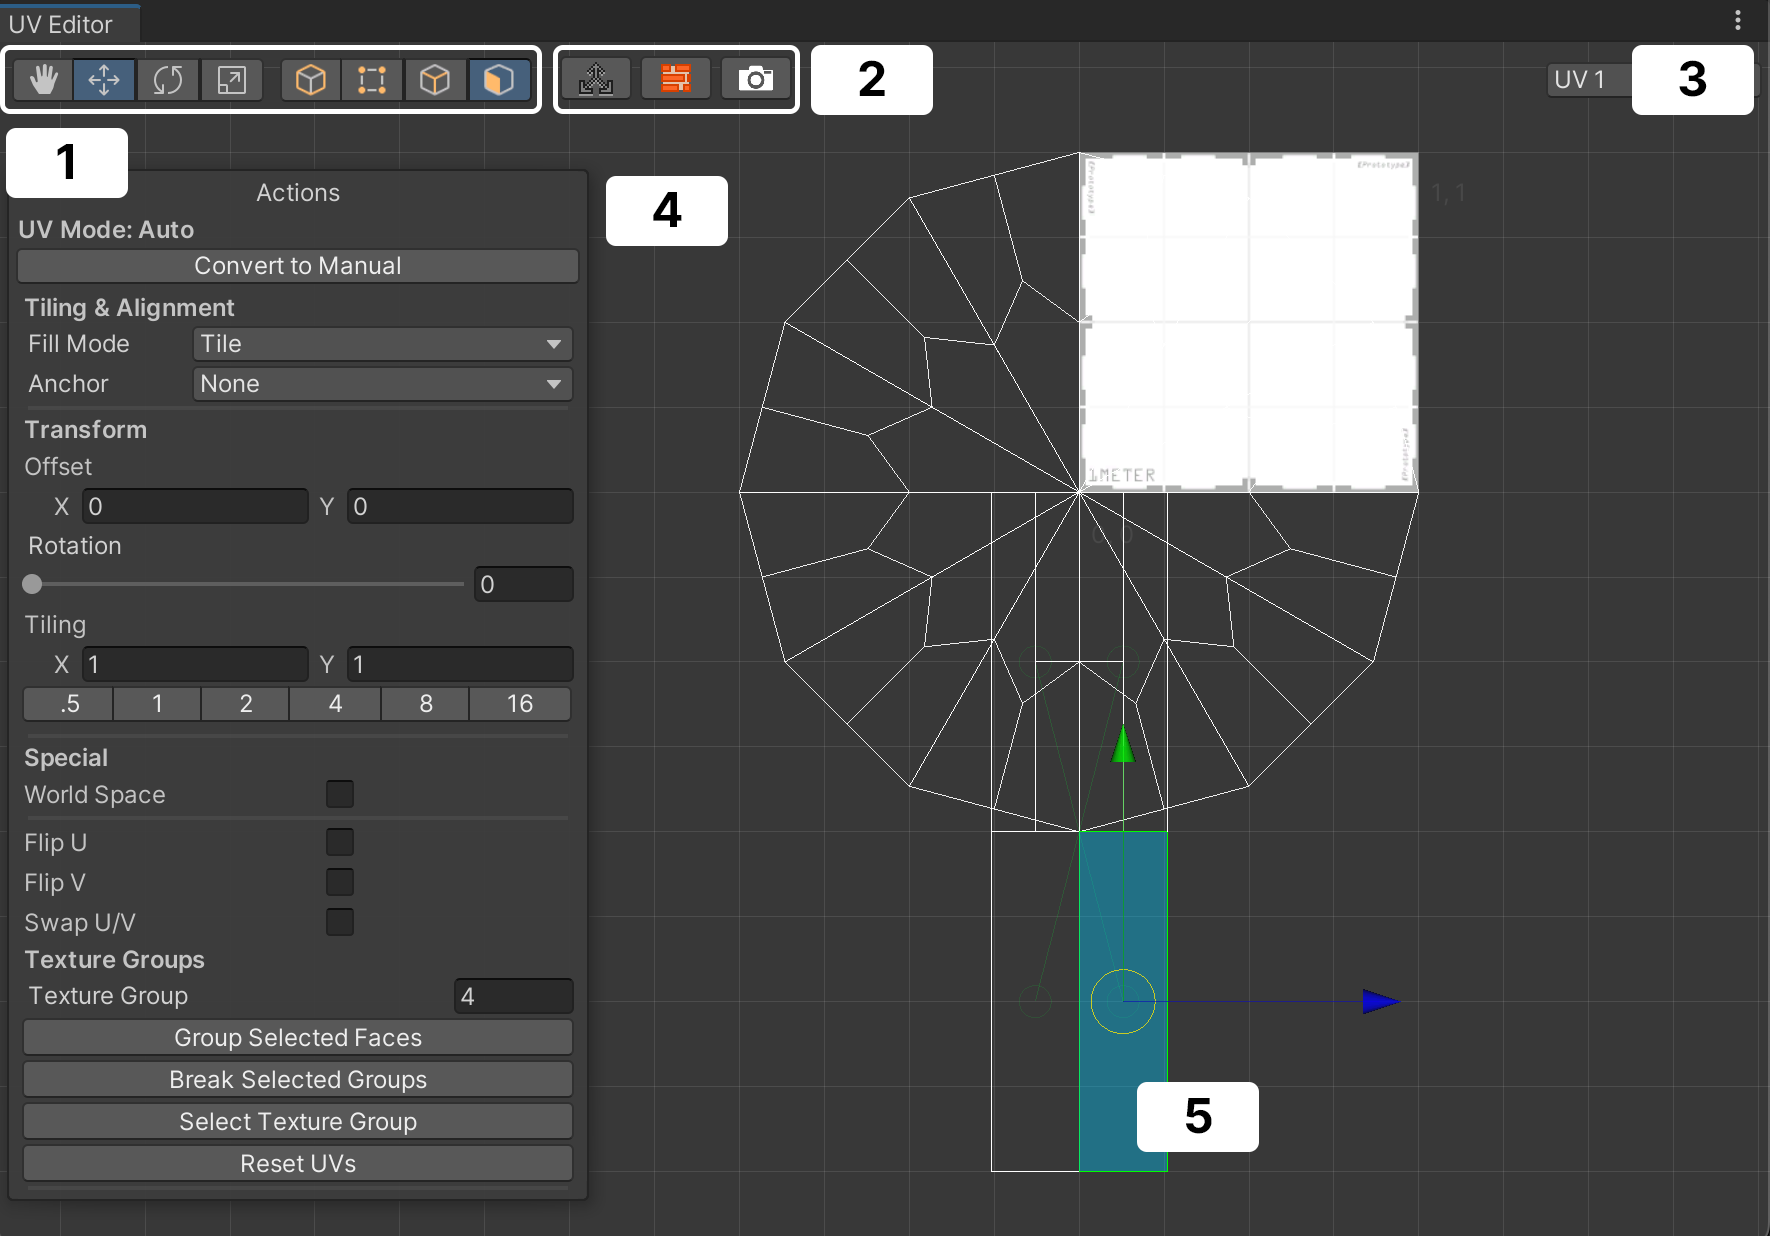
You can manage texture mapping on a selected mesh with the UV Editor. Let’s look at its main work areas.
- This is the same toolbar as that in the Scene view, with options to move, rotate, and scale vertices, edges, or faces.
- These buttons enable you to manipulate the UV mapping coordinates directly from the Scene view when they are enabled. They are colored when active and gray when not.
- The button with arrows locks the transform tools on the Scene view to manipulate the UV instead of the transform of the selected element in the Scene view (edge, vertice, face, or object).
- The “brick” button enables the preview of the texture coming from the shader at coordinates 0,0.
- The camera button will output the texture with the polygon wireframe overlaid on the texture for reference when editing the image in DCC software. By default, it will save the file in your project Assets folder.
- Select UV to edit the UV mapping for shaders. Select UV2 (read-only) to regenerate your baked or real-time lightmaps.
- There are two ways to work on UV mapping for the selected object:
- Auto: ProBuilder manages the texture mapping according to the settings in the Actions panel, even when you resize the mesh. This is the default option and probably enough for most level design work, especially if you will only work with repeating patterns for prototyping purposes.
- Manual: This method allows you to precisely unwrap and edit UVs, render UVs, and more. It’s recommended for positioning the UV elements against a detailed image. You can watch this tutorial for a step-by-step look into advanced texturing with manual UVs.
- You can manipulate the elements to neatly arrange them in a way to match the shader texture. In the image above, a selected face is highlighted in blue.
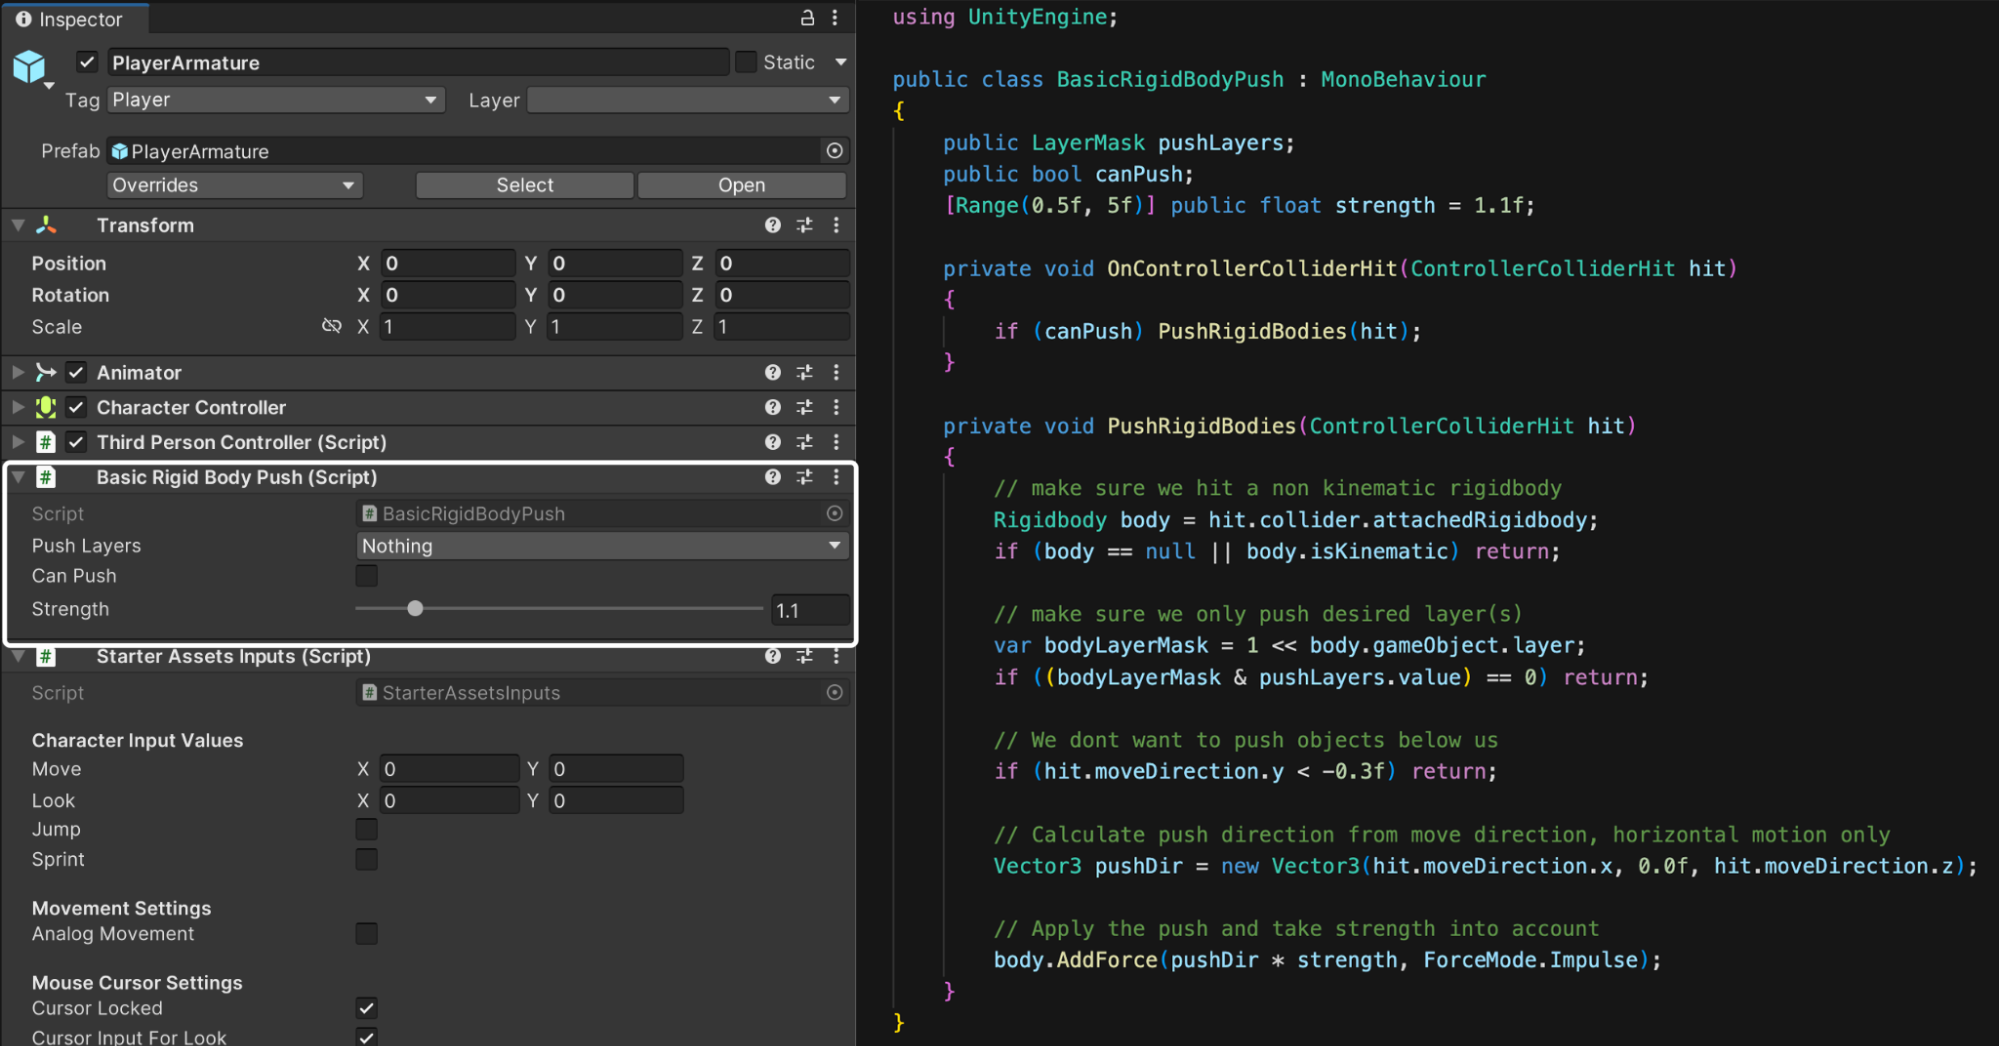
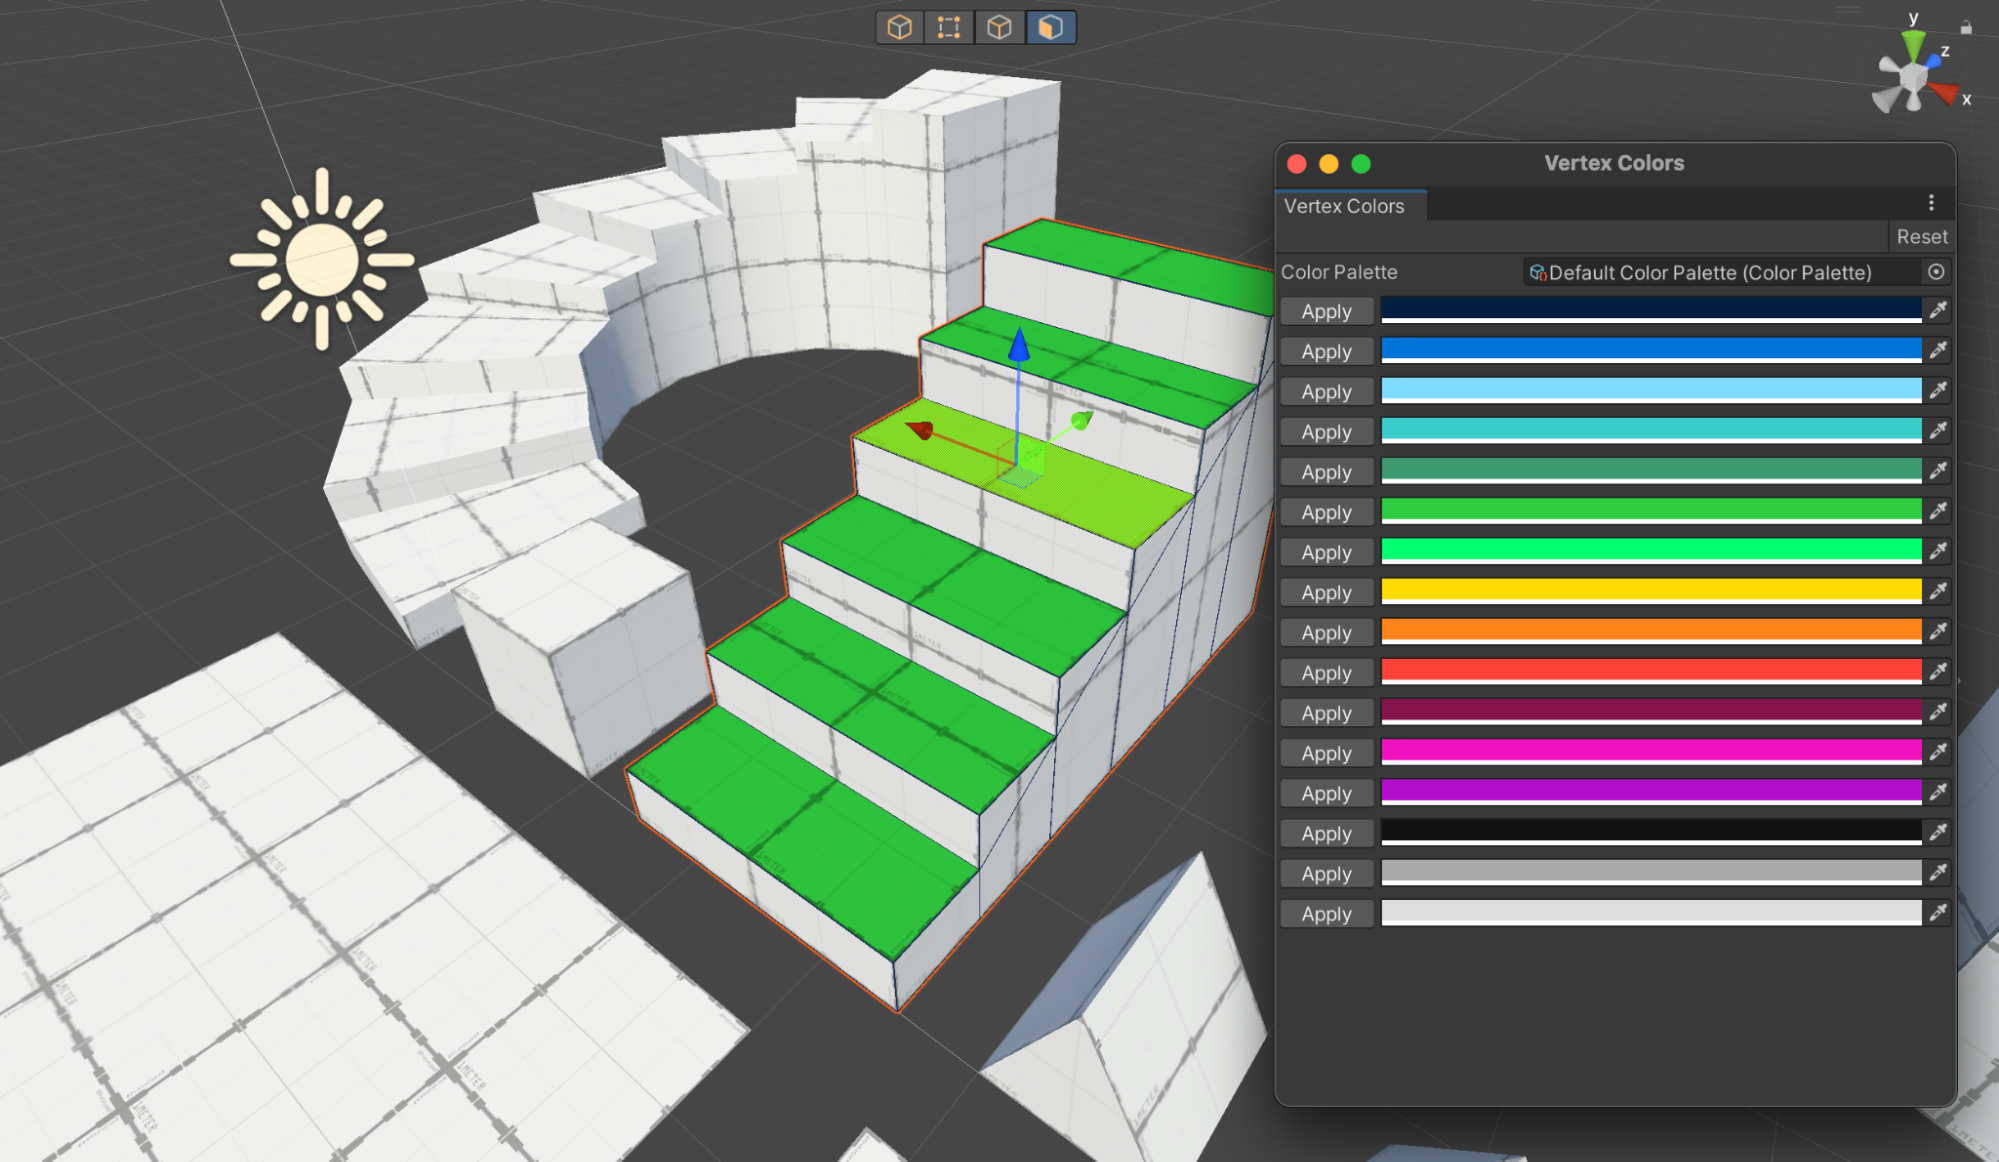
Tip: Color coding for fast level design
Color coding while boxing out levels can help convey your intent and ideas more clearly. For example, you could communicate to the rest of your team which elements are destructible by coloring those red.
In the Vertex Colors feature, select the “plus” icon to create a color palette. Customize a palette to define the colors (and the number of colors) that you want in your scene.
To color an object, select it in the Scene and click Apply. You can apply color to individual faces as well, then share your saved palette of colors with your team so that everyone is using the same color-coding standards.

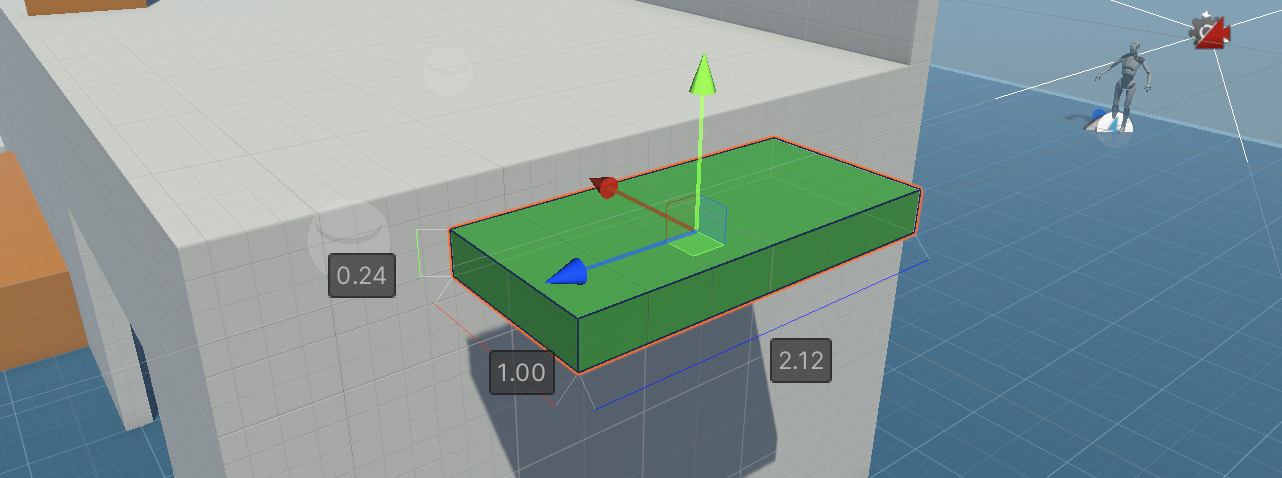
Tip: Enable dimension overlays for ProBuilder
Under Tools > Probuilder > Dimensions Overlay, you can enable floating labels indicating the size of the current selected object in the scene.

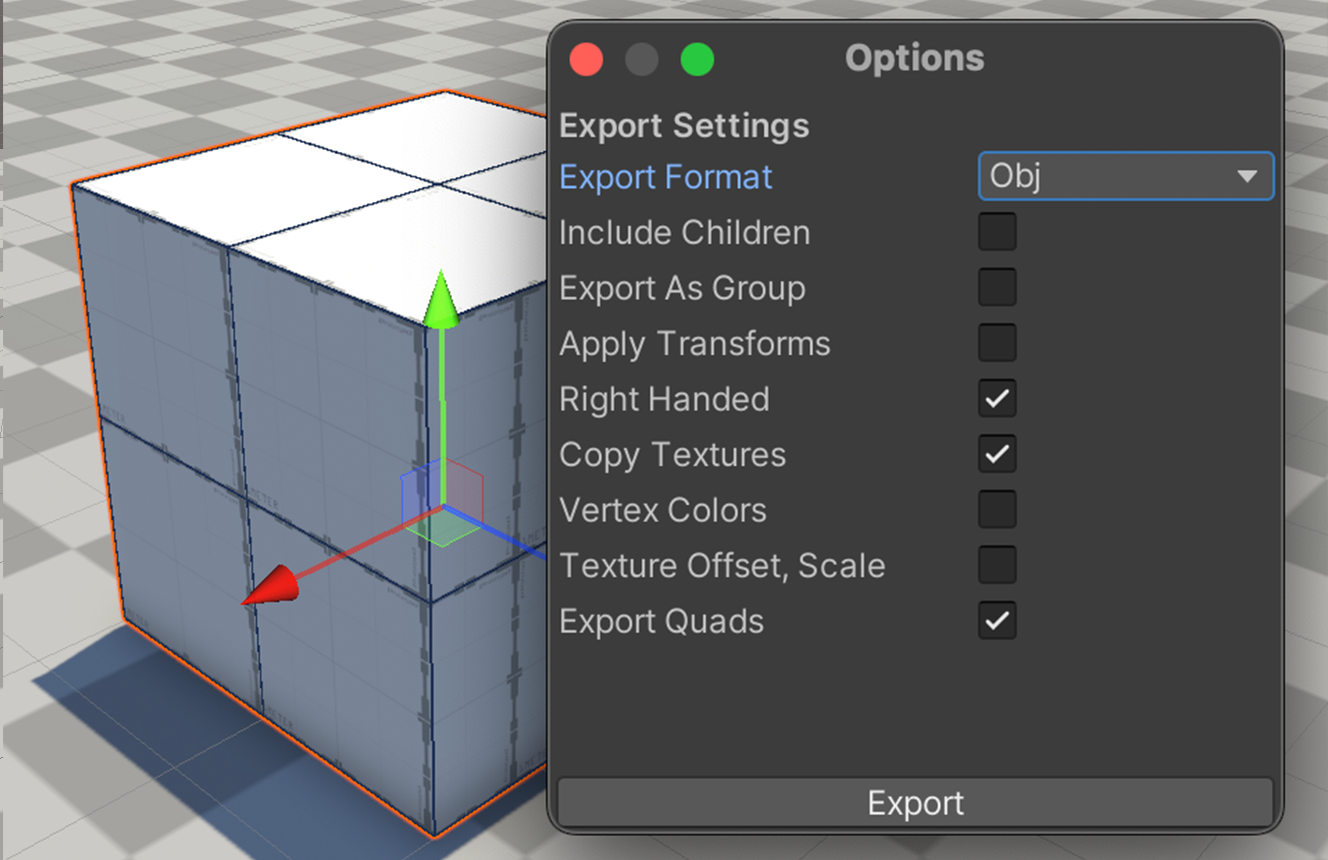
Sharing ProBuilder levels with environment artists
You can use the Export feature inside Probuilder or install the FBX Exporter package to export your prototyped level assets, with the correct dimensions, to a DCC application for an artist to polish and refine them.

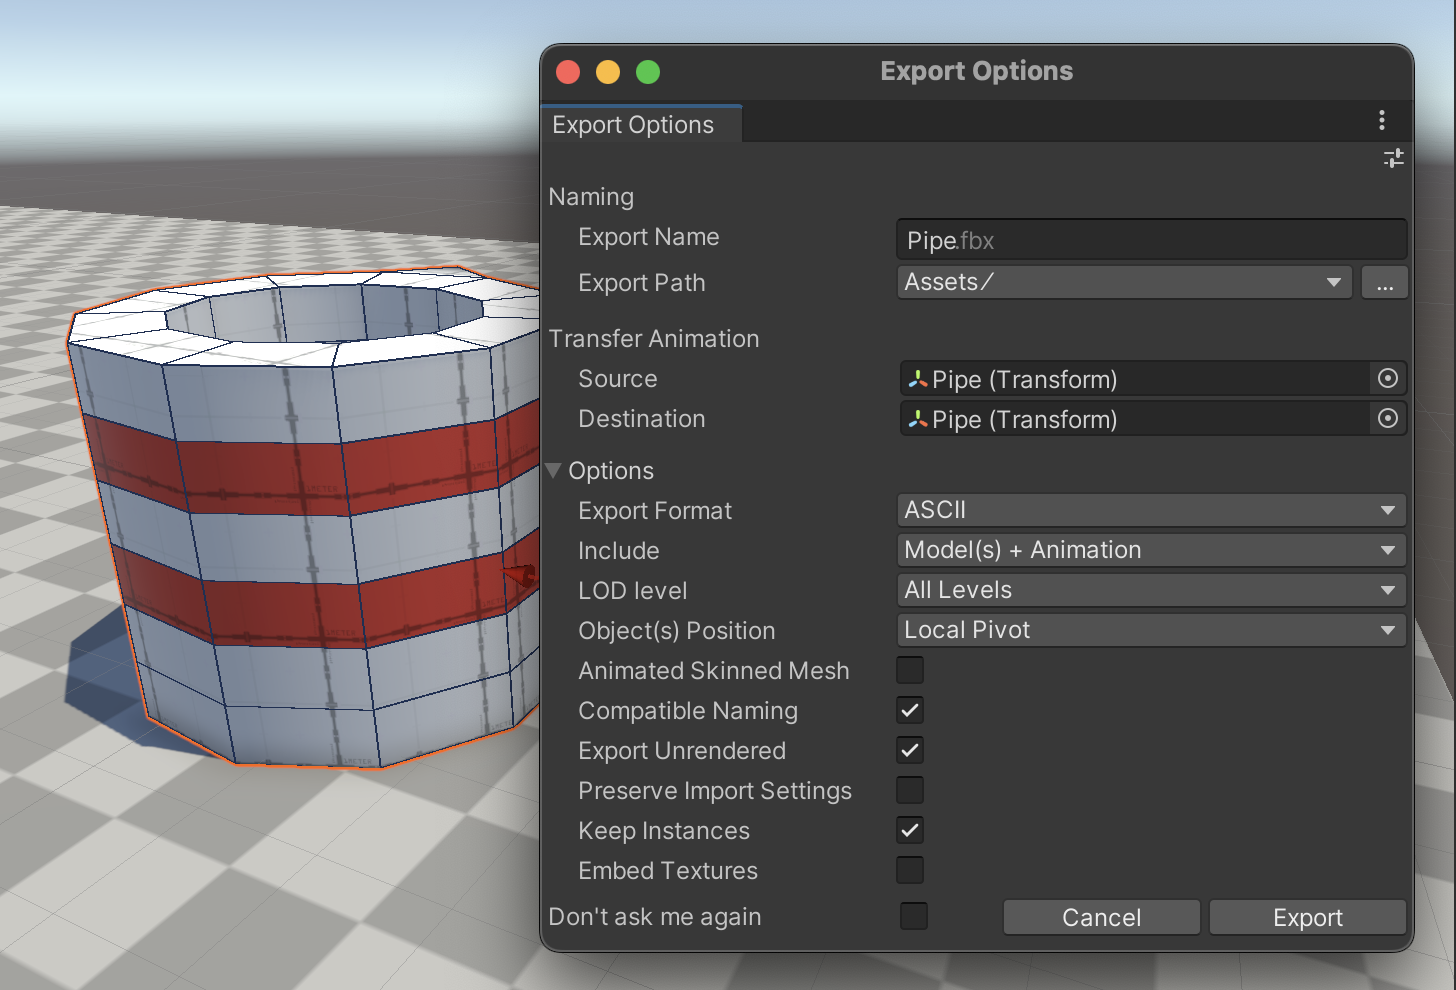
Defining a clear work plan with the team will allow for a smooth and efficient design process where the artists will be able work based on the right size and shape of the 3D environment objects seamlessly.
You can also use ProBuilder or Unity Asset Store tools to “kitbash,” which involves combining different assets to create something original and new. The idea comes from modeling hobbyists, who mash up model train or airplane kits to build their own custom projects.

More advanced guides for Unity creators
Our level design e-book is the latest addition to Unity’s collection of advanced guides for professional developers, artists, technical artists, and designers. All the e-books are written by Unity experts and free to download. You can find them and many other resources on the Unity best practices hub.
Is this article helpful for you?
Thank you for your feedback!
- Unity Labs
- Copyright © 2024 Unity Technologies