Simulate stylized characters for games with Ziva VFX and machine learning


Brian Anderson is a Unity solutions engineer with a background in film production. He has worked as a character artist and generalist for almost 30 years. This content was originally presented at GDC 2023. You can watch the full recording on our YouTube channel.
Since I began my career as a 3D artist, the industry has changed dramatically. We are now in the age of real-time, machine learning, and AI. This continual evolution in technology opens up creative possibilities like never before.
Ziva is at the forefront of this evolution. Tools such as Ziva VFX and ZivaRT apply the powers of machine learning to character deformation, and they can be used for either stylized or photorealistic assets.
This workflow demo will showcase how these tools can be used to simulate a feature animation-style character. These techniques can also be applied to any kind of character deformation, including photoreal, and for linear content.
Machine learning for character deformation
A character rig is made up of a lot of different things. Two of the main components are the joint hierarchy/bound skin and the deformation corrections. It’s typically those deformation corrections that are going to be slow with our character rig.
However, if we take a traditionally made character rig and run it through a machine learning process to learn those deformations, that same character is going to evaluate faster.
Character deformations could be made up of all kinds of different things:
- Custom deformers
- Hand-sculpted correctives
- A system of helper joints with complex behaviors that help maintain volume
- Anything that “corrects” or changes the way the default skin behaves when we move the joints
All of these deformations have a performance cost associated with them.
We’re going to input the joint hierarchy and the skin deformations into the machine learning process. By training over a wide range of motion, we’re going to be able to learn all of those deformation effects, then collapse them down to that single machine learning node that’s going to handle all of the skin deformations.
This is a typical use of machine learning as an optimization step in our character publishing pipeline, and we see this process used by multiple studios in the industry.
As a character artist, this leads to a bit of a lightbulb moment when you realize that if we can machine learn any type of deformation without having to worry about performance cost, then maybe we don’t have to create our skin deformations the way we used to.
And maybe there’s a way to deform our character to really harness the power of machine learning, so our character can not only perform faster, but also look better.
Creating a rich deformation system with Ziva VFX
Ziva VFX works as a Maya plug-in and is used for character simulation. It allows you to duplicate and replicate physics effects in muscles and soft tissue. You start out with an anatomically correct skeleton, build muscle objects on top, add all the material properties, attach those tissues together, and then simulate them along with the skin. This creates super realistic deformation effects in the mesh.
You can read more about Ziva VFX on the blog, but for this workflow, we’re going to look at the opposite end of the spectrum: creating a stylized character and a stylized simulation build.

Applying simulation techniques to a stylized character
With stylized characters, especially for feature animation, microforms and detailed muscle effects – things that we associate with simulation – are seen as distracting, and they usually don’t match the art direction of the project. Applying simulation techniques to this type of character will likely have different goals:
- Keep forms simple
- Clear silhouettes
- Clean lines
With a simulatable deformation system, we can automate things such as corrective shape generation and complex combinations. We can also raise the base level of deformation quality with consistent deformation and the physicality of simulated results. Finally, we can improve the character artist’s workflow by giving them an appealing and believable high-fidelity base level of deformation.
This allows for more time spent on art direction, ultimately ending up with a better character on screen.
Process overview
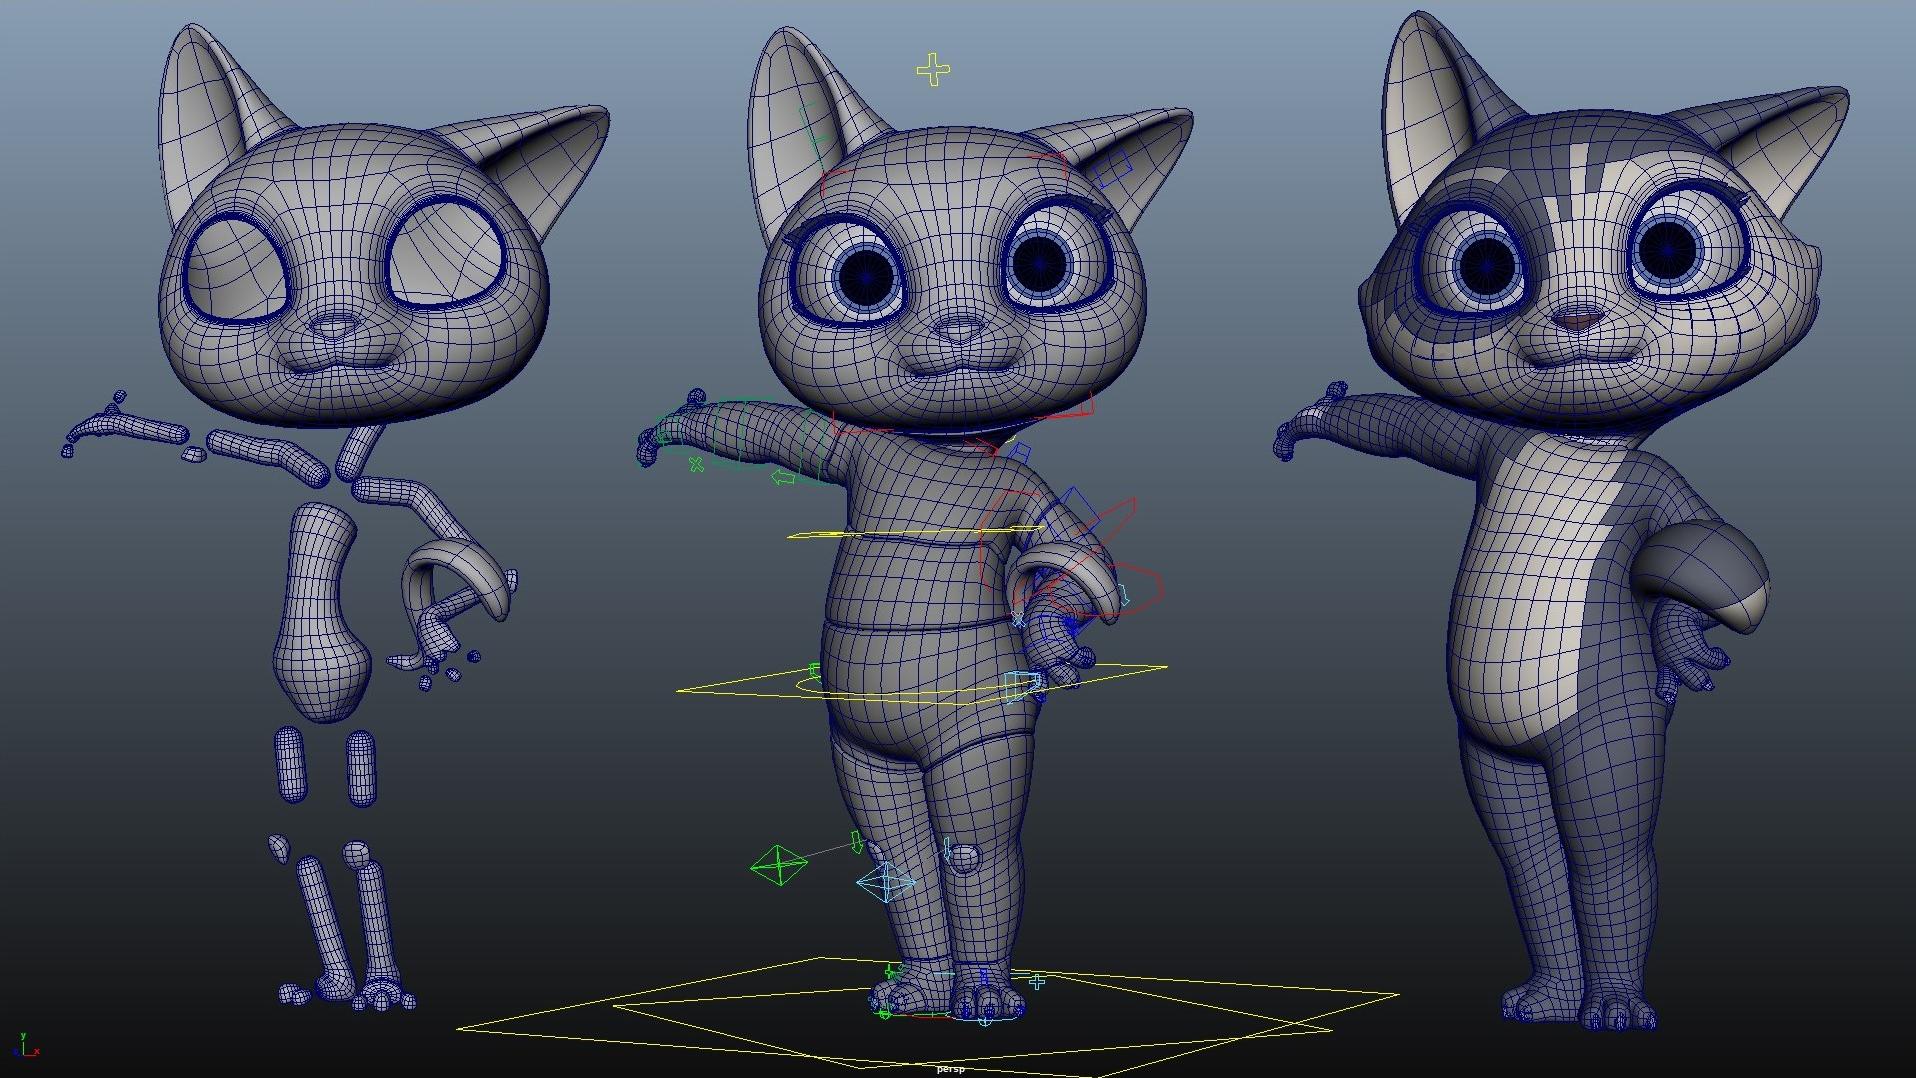
We start with a control rig.
Next, we build and bind our bone geometry, then add the tissues we wish to simulate, driven by the bones. The deformation of these tissues are going to be controlled completely by the simulation. After that, we can use a simple Maya wrap deformer to attach our character geometry to our tissue objects so that they all deform together.
Once that’s completed, we can harvest that deformation data. The best way to do this is a machine learning process using Ziva. In this way, we can take full advantage of the deformation system with seemingly infinite shape corrections and combination corrections.
If your studio isn’t using machine learning yet, you can still extract shapes by hand and input them into a Pose Space Deformer-based rig system. This works very well because of the consistency of simulation, where all shapes come from a single system with one set of rules.
This means when we extract corrective shapes from that system and put them back together in our PSD, transitions between those shapes are going to line up, as will the features and forms.
Simulation inputs
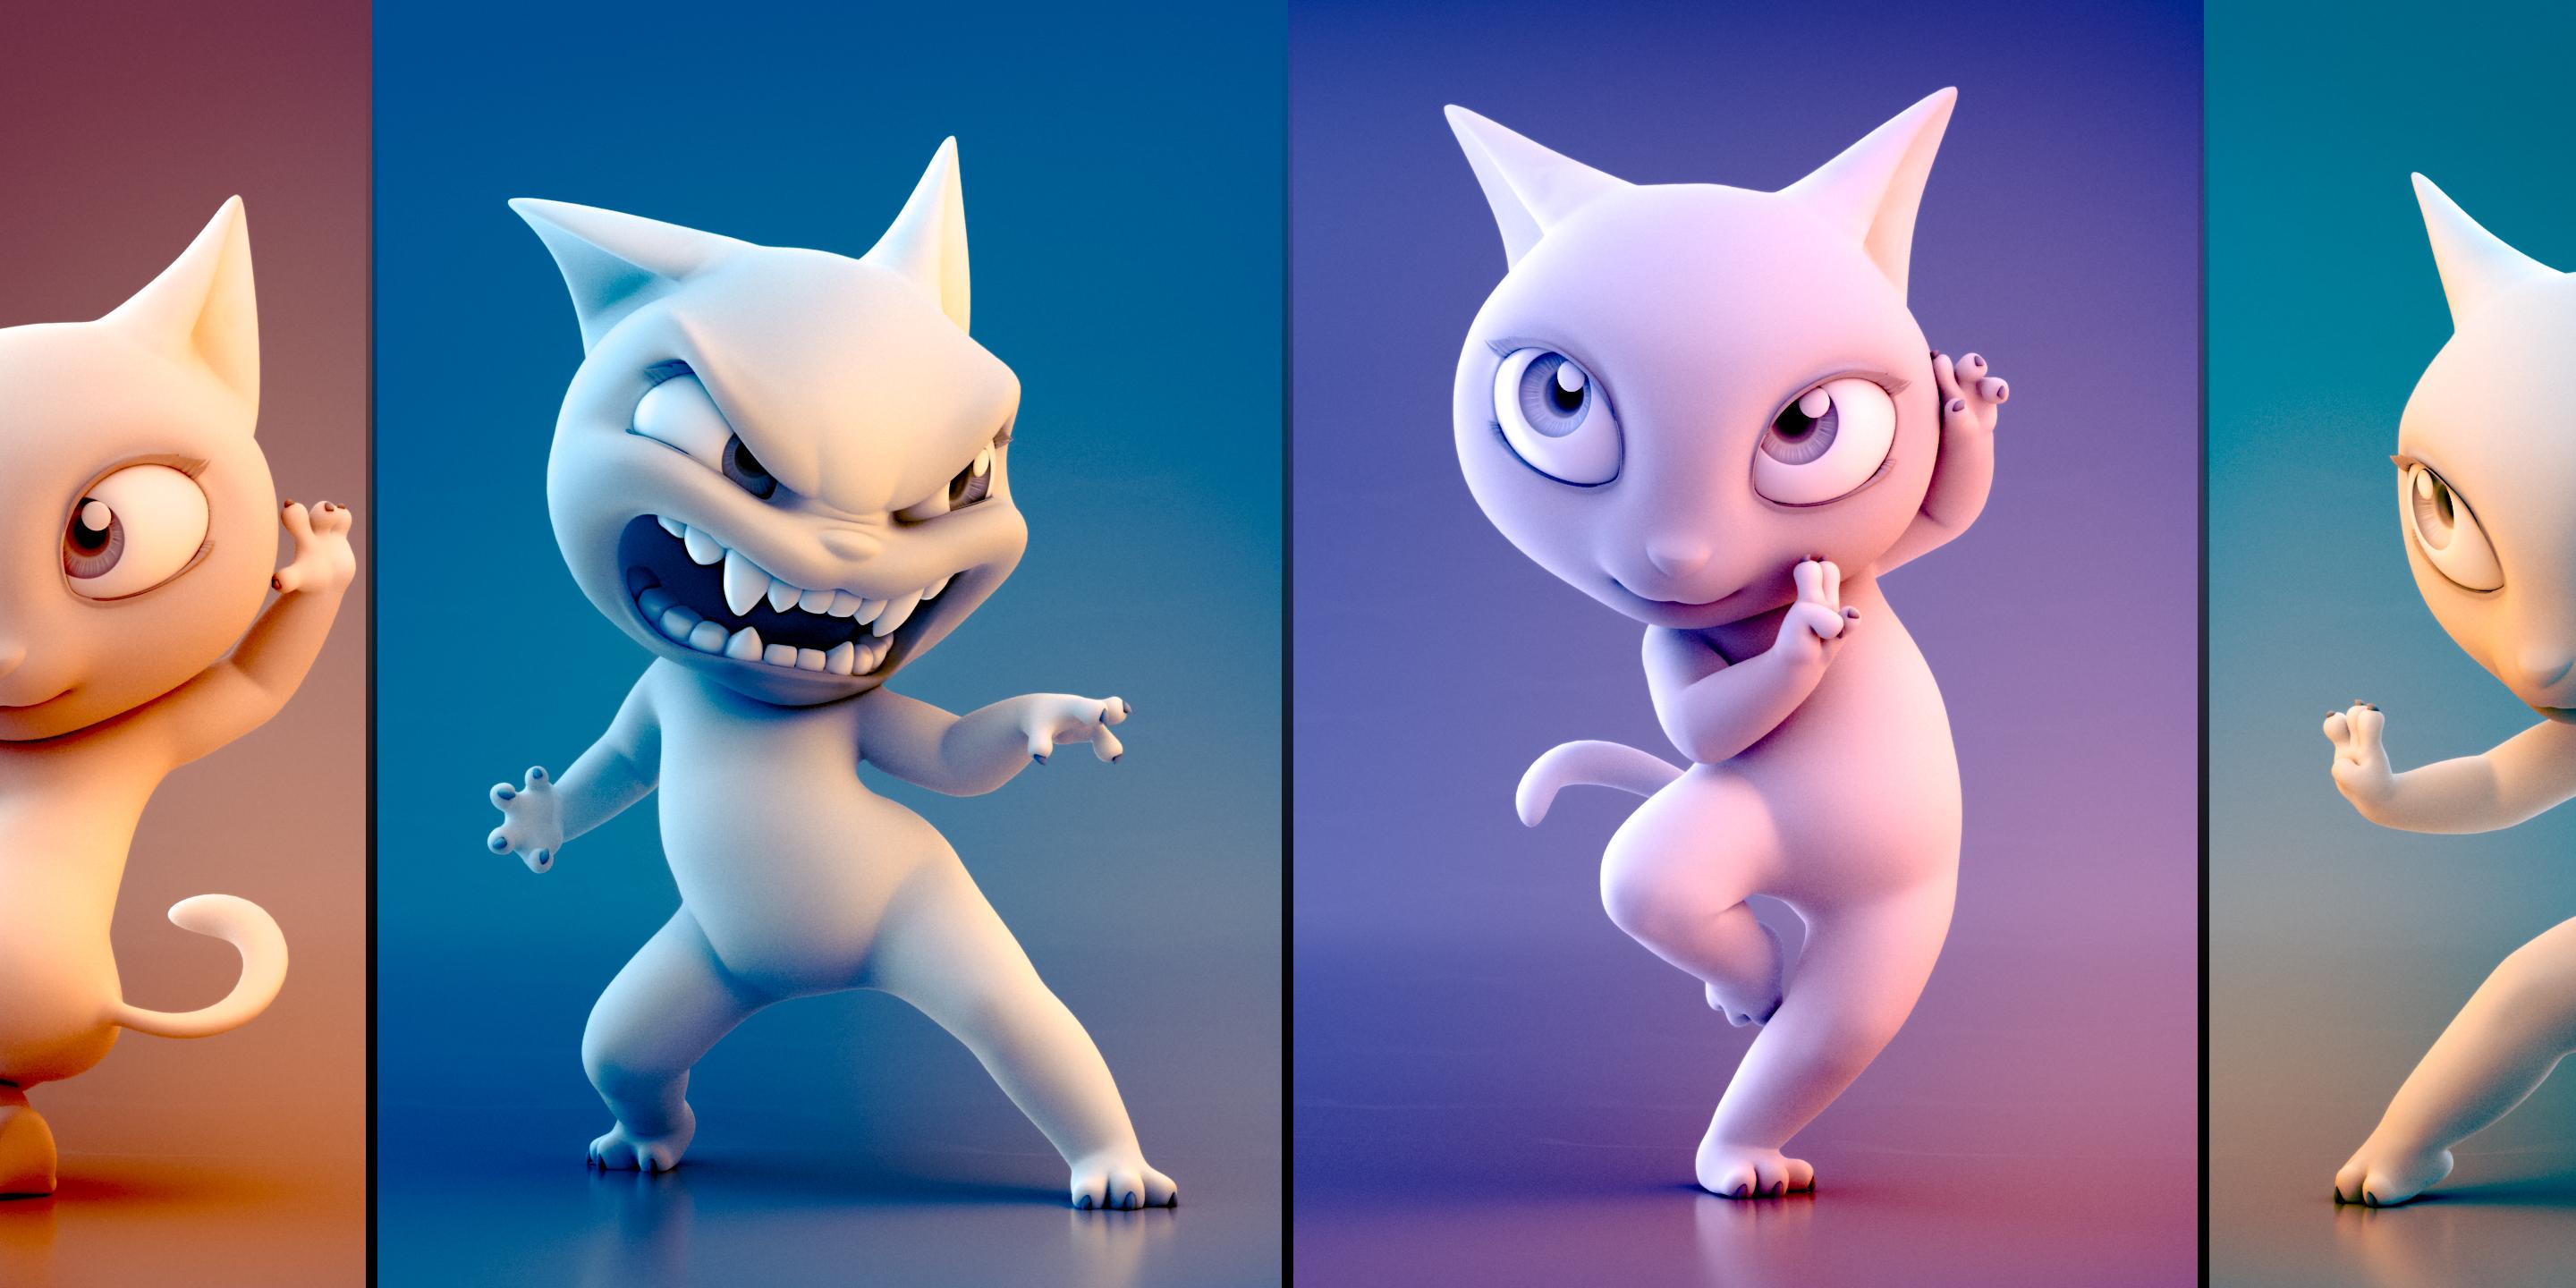
Simulation is really good at replicating something from the real world. If we were creating a realistic human, we would use a realistic human as our reference. For the purpose of this demo simulating a stylized character, I chose a stop motion puppet as my reference.
Bones
The bone geometry drives the simulation. Here, you can see that I have modeled them from simple primitive shapes, mostly cylinders. I have taken some liberties with bone design, leaving larger gaps at the connection points. This allows for a greater motion range during the simulation, and the floating bone caps were added to the knee and elbow to allow for better control of the silhouette of the bent limbs.
Tissues
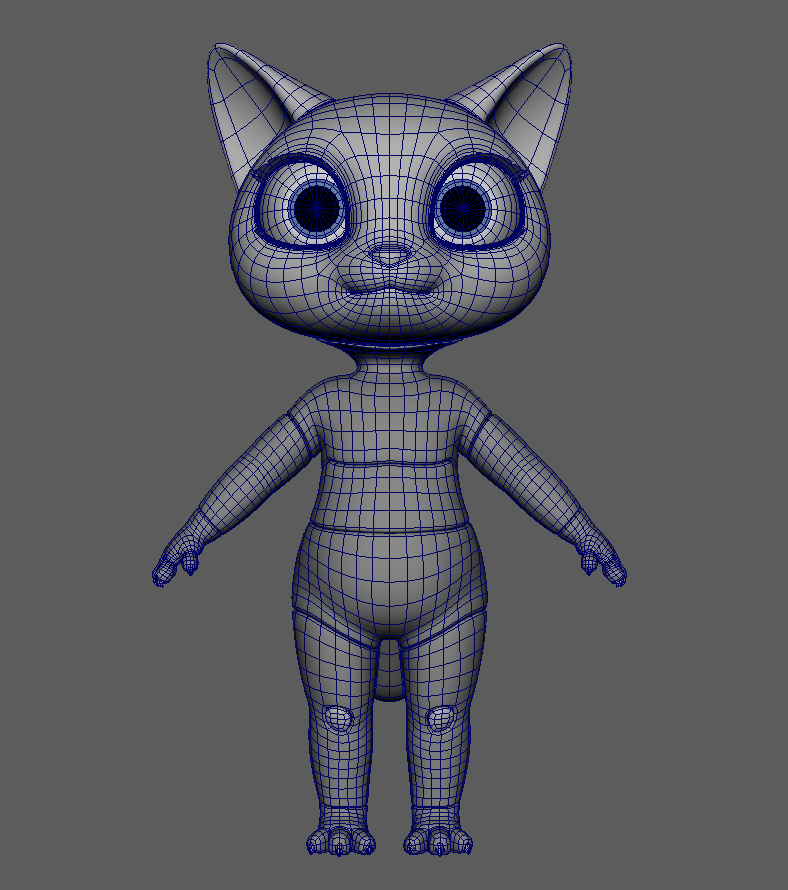
The tissues are what we simulate. Driven by the bone geometry, their deformation is controlled completely by the simulation. We can give these geometry inputs material properties, and that’s how we define how they’re going to react when deformed.
The tissue layout is segmented by body portions. This is not necessary – it’s just for the workflow – but I find a modular approach is helpful for organization:
- Make edits (copy/paste/save/load) to the body parts in sections
- Turn off areas of the model to speed up the simulation testing and work on the setup in sections
- Manage simulation components (materials/attachments/tetMeshes) separately in groups for easy access
- Make overall material changes by section without painting maps, which can help a lot while building up the simulation
How it all fits together

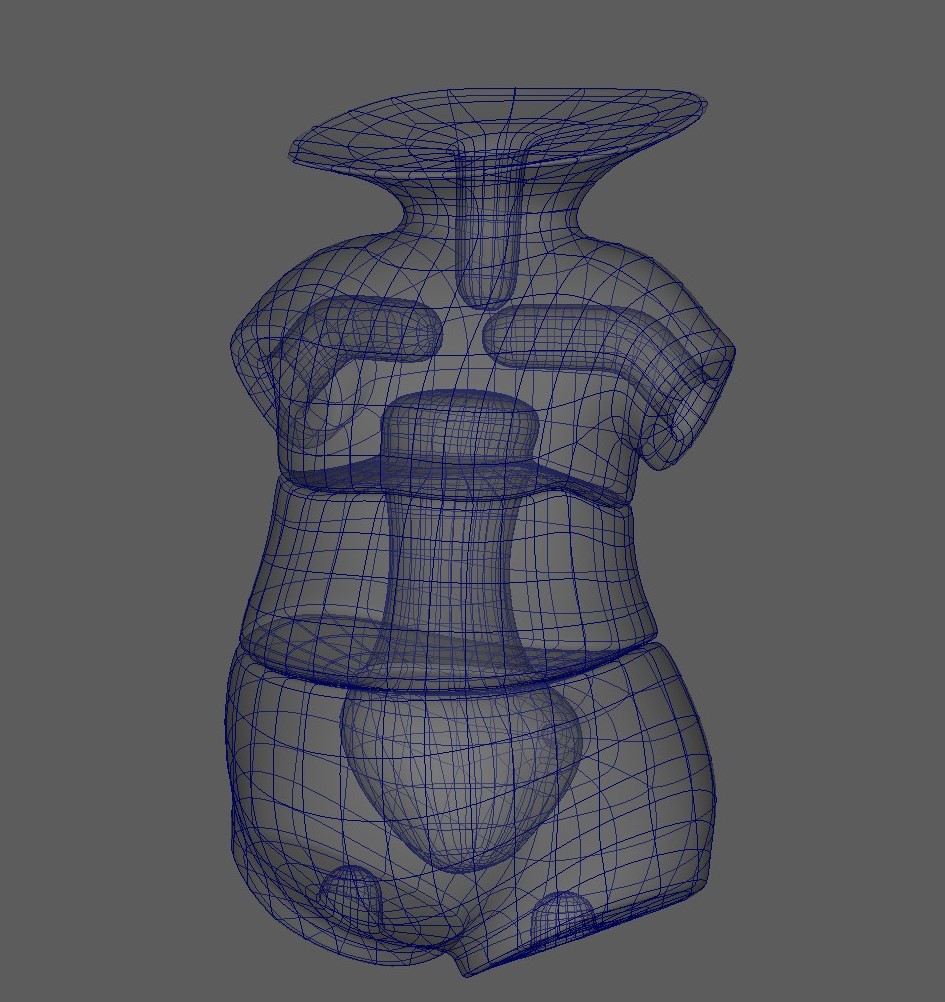
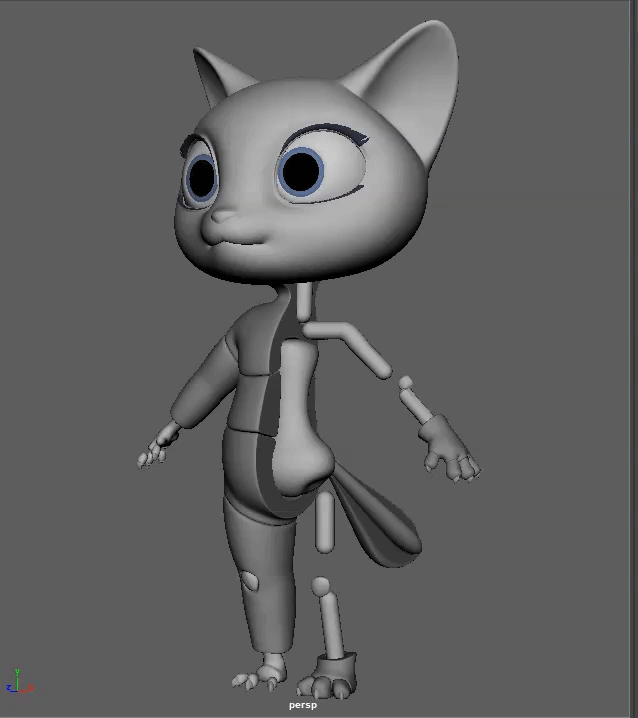
If we look inside our character, we can see the tissue objects are modeled to be hollowed out around the bones. It’s important that we do this cleanly and avoid any collisions with the bones. If we chop it in half, we can see how they’re assembled.
A common question is how thick the bones and tissues should be. If you just had a cylinder, you could put a really thin set of bones in the middle, then, when you deform those bones, the simulation is going to control most of what the deformation looks like. Whereas if you had really thick bones in the middle and a thin layer of tissue on the outside, then the bones are going to be responsible for most of what the simulation looks like in the end.
What we really want to do is make our bones thick enough that we can get a sense of structure, but not so thick that when we deform them we feel like they would need corrections. The whole point of this technique is to not do a lot of hand sculpting. We want to keep something like the spine, which is going to be bound to our character thinly enough that it can deform nicely without needing corrective shapes.
Time to bind and simulate
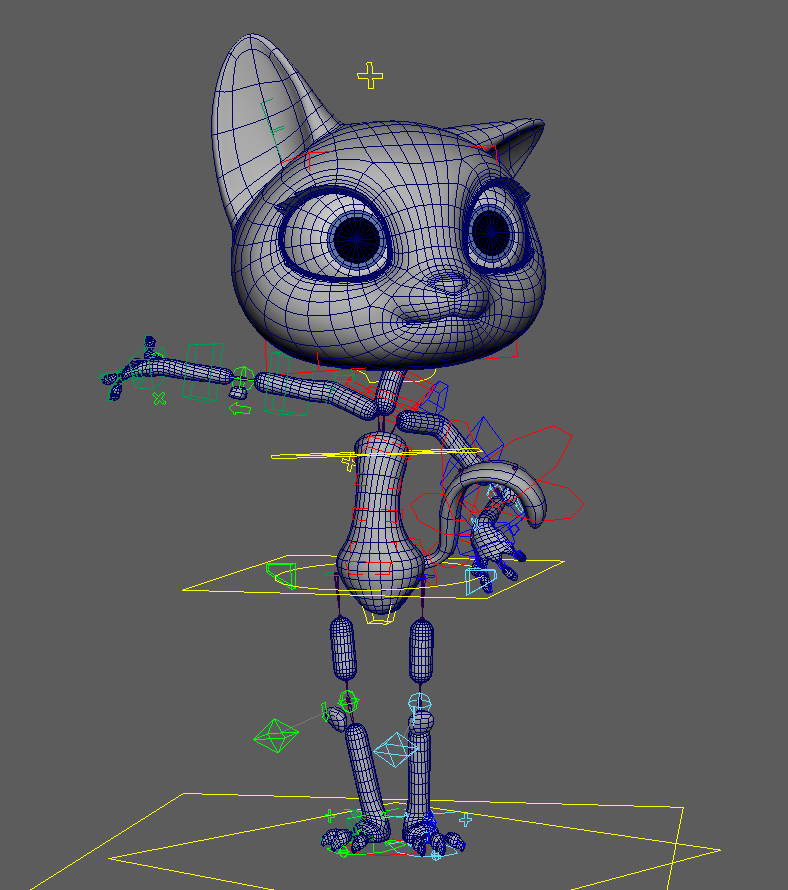
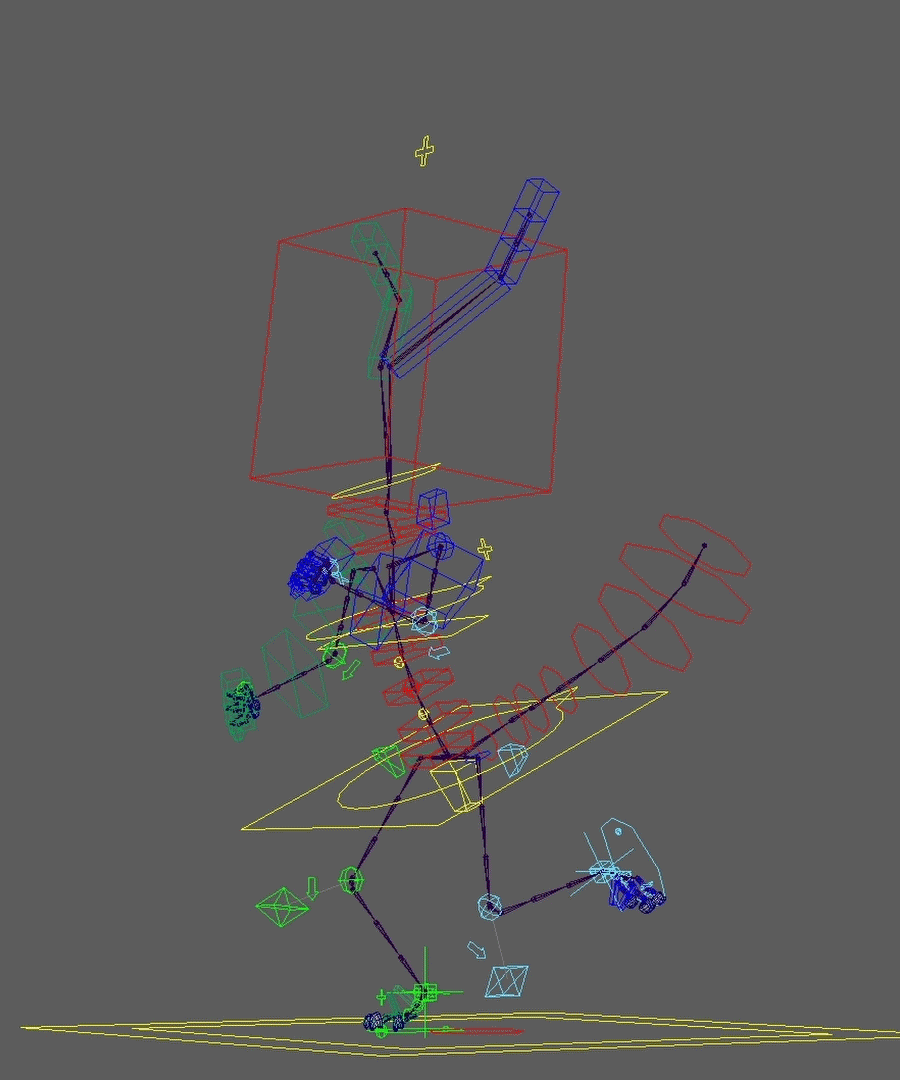
Now that our inputs are modeled, we can bind the bones to the joints of our rig. This is fast and very straightforward, but it’s also an iterative process where we will test the simulation and make adjustments where we need to.
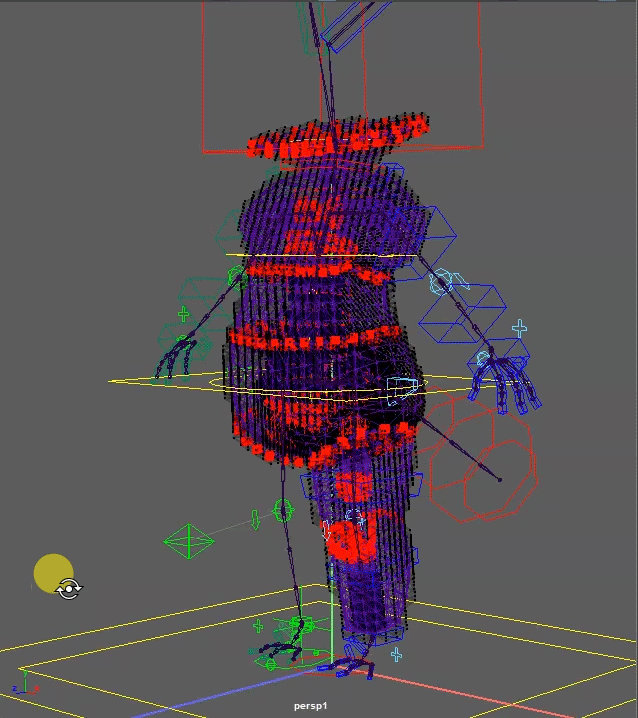
We can see some of the simulation components here:
- The tetrahedral meshes that deform our tissues
- Some of the attachment points that hold our simulation together (in red)
One thing to mention right from the start is that we’ll be using the quasi-static integrator for these simulations. It sounds complicated, but it’s not that bad: It’s like stop motion. Each step of the simulation is solved to the equilibrium state.”
This means we’ll solve for the deformation, but not for secondary physical effects like the jiggle that comes from fast motion. This is exactly the behavior we want to make this simulation useful for machine learning or PSD shape extraction.
Stylized character simulation in action
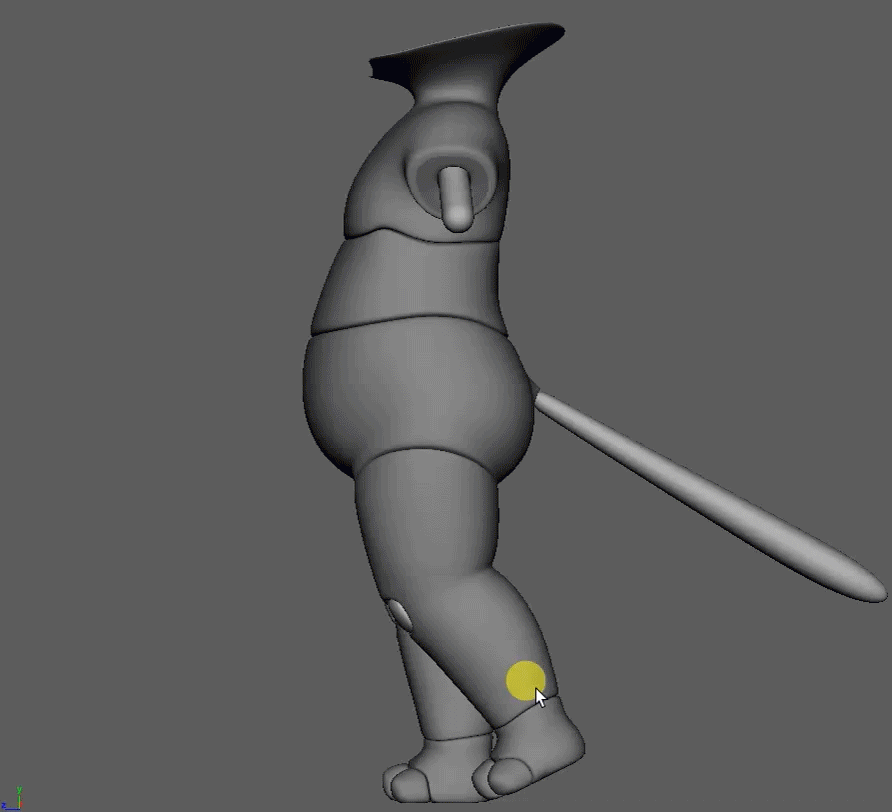
Leg
Here we have the leg rotation 130 degrees forward in isolation, with some heavy deformation happening on the pelvis tissue.
We can see:
- The deformation is holding up, with a sense structure maintained and nice form
- Proper collisions
- Clean geometry
- Gaps in our bone armature help to extend this range by leaving a lot of open space for the simulation to work
We can also see that lower body deformations are pushing up all the way into the chest as volume spreads naturally over the torso.
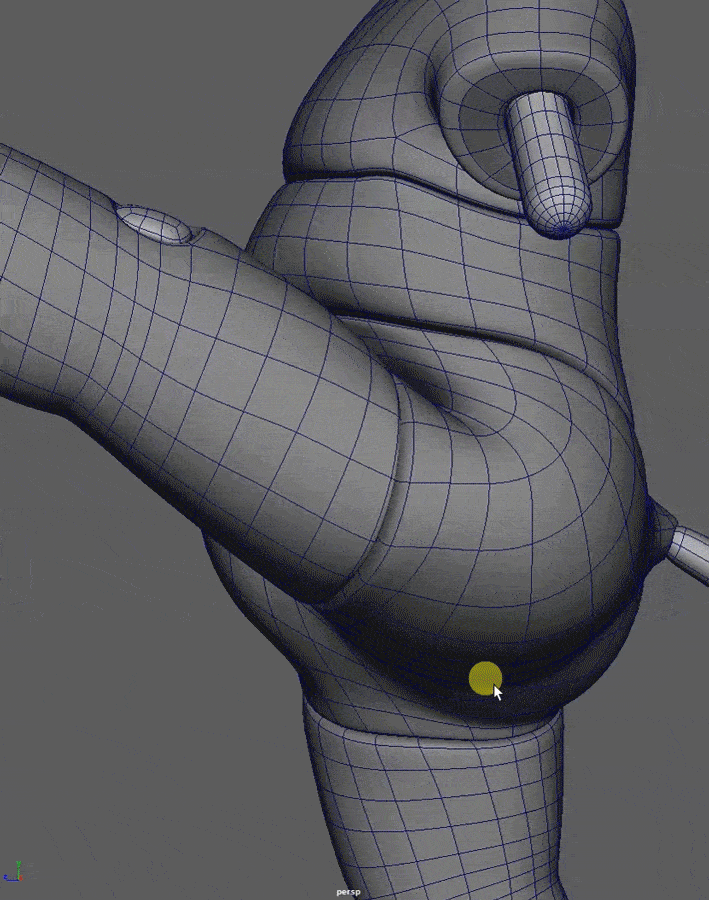
Knee
Here, the knee rotates 125 degrees with some interesting collisions/compressions happening in the back.
We can see:
- Shapes that have a sense of structure, which gives us that physically correct feeling.
- Subtlety in our deformations, so even at minimal rotation degrees we start to see a nice sharp/clean crease forming on the back of the knee, from the start all the way through to the end with proper collisions
We can also see our bone design doing its work on the right:
- Shortened sections around the knee give space for us to reach those extreme bends
- Cap geo on the surface lets us hold the form and it gives us a way to art direct the shape knee bend
Now that the stylized character is in motion, we can start to see some of our original goals coming through that match the style we’re trying to hit. We’ve got those simple forms, we’ve got the clean lines and silhouettes, and we’re getting that really nice volume preservation.
We have also achieved a feeling of physicality and broad deformation falloff, and also a really nice, super clean, deformed surface, especially around the highest deforming areas like the leg here.
Simulation stats
- Simulation time: 10–15 seconds per frame
- Tissues: 25
- Bones: 30
- Attachments: 100
- Maps: 286
- Materials: 61
Looking back at the entire simulation build, the component count is quite manageable, as is the simulation time of less than 20 s per frame for the full body. This means we can still pretty easily iterate on the design and do a lot of simulation testing locally.
Using the quasi-static integrator also sped up the simulation significantly. For this specific character, there is just over a 30% increase in speed for the full-body sim.
With just one hand/arm/chest, the simulation speed is about 2–3 seconds per frame, making it great for testing out and building up the simulation. For longer animations, we can send them to the farm to simulate with Ziva VFX in batch mode.
“Why use simulation? It’s complex and time consuming!”
If you’re making characters at a high level, you’re probably already using a complex system to manage the deformations, and making changes in those systems can be difficult. With simulation, we can edit the deformation system as a whole and create an appealing and believable base layer, then use handmade blendshapes only for targeted art direction.
Pair with ZivaRT for machine learning to generate:
- Near-infinite corrections, with a lot of coverage
- The driving system for all corrections
- Super performant characters
Recap
We wanted to create a stylized character using Ziva VFX in a game environment, and in order to achieve this, we had to:
- Move simulation from the end of the character pipeline to the front and use it to generate our character deformations. This became a library of how our character moves, and we can harvest that data either by machine learning the result or by extracting shapes to a PSD corrective shape system.
- Once that shape data is in the rig, everyone can benefit from the result:
- Materials/grooming/cloth get clean deforming surface
- Rigging, and the character rig itself, get a lot of benefits that we’ve gone over in detail – but spending more time on art direction, instead of fixing poor deformation
- Animation gets an asset with higher-fidelity deformation, with more corrections that work better together as a cohesive system
If we pair this with machine learning, then we can get high-quality deformations that run in real-time and are perfect for games.
Discover how you can create rich, complex, and more believable characters for any size or style of production with Ziva.
Is this article helpful for you?
Thank you for your feedback!
- Unity Labs
- Copyright © 2024 Unity Technologies