Technical art behind the raging color of I See Red


In this guest post, Whiteboard Games details the history of the studio’s first commercial release, I See Red, and shares the technical thinking that went into the game’s unique approach to color.
We're Whiteboard Games, a development studio founded in 2021, in Buenos Aires, Argentina, by five college graduates who wanted to chart their own path in the game industry. Since then Whiteboard has grown to a team of 30 young professionals, and you're reading this intro because we're gathered here today to talk about our first commercial release: I See Red.
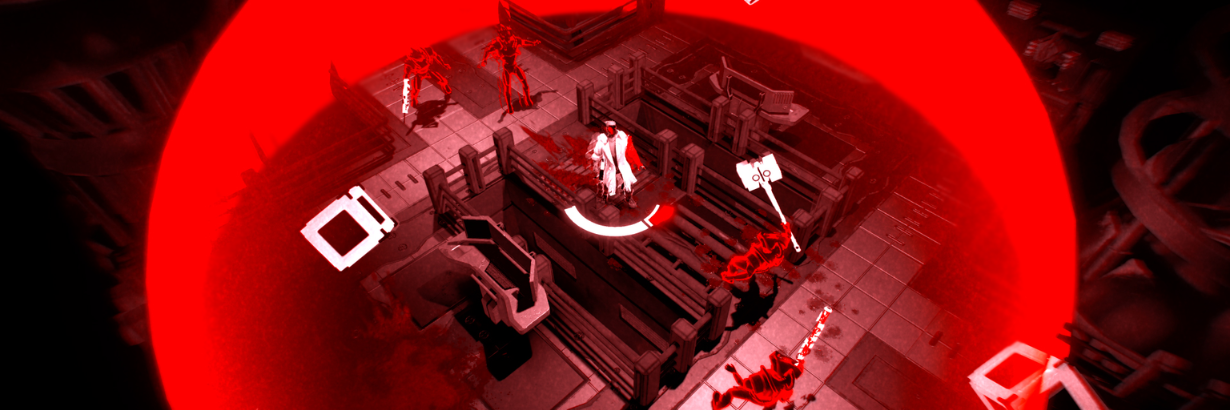
I See Red is a frantic, twin-stick shooter roguelite that's all about rage, combat, revenge, blood, tragic pasts, and – yes, it's in the name – RED. It is not hard to spot among other games, not only because of the sci-fi environments and top-down camera, but also because of a crucial aesthetic: You’ll be challenged to find more colors than black, white, gray, and red. This is a decision that was made early on and is tightly linked to both narrative and gameplay aspects. Of course, it does come with its challenges: Making (and playing) a game with such a limited palette is not for everyone. How, then, did we go about it? Keep reading to find out.
History of I See Red
Let's start with a brief history detour, to examine how the look evolved over time and the pivotal decisions that led to what I See Red is today.
First prototype
It all started with a thesis project for the “Video Game Design and Programming” course at Da Vinci First School of Multimedia Art in Buenos Aires. From this work, a game was born that needed to be artistically less demanding since students don’t have much funding. At this point, the color red had not yet taken over. There was blue, even green, in the game, but don’t get too attached because the additional colors won’t be around for long.
Professional development
Following completion of the course, our founding team could not let go of the project, seeing real, commercial potential in it. We decided to continue the development outside of college and assemble a team, which led to establishing Whiteboard Games as a studio. (Fun fact: Some of our professors saw potential, too, and, when asked to help, decided to join the team.)
At this point, the bases of the game had already been covered: a fast-paced sci-fi shooter about red, raging revenge.
Final look (with HDRP)
Months and even years went by. Amid talks with publishers and investors, I See Red grew to have many interconnected levels – now not only with human enemies, but aliens, too – an enormous amount of passives, cutscenes, and an even more polished artstyle. With enough bug fixing, testing, content, and performance improvements (it’s okay, no need to thank us), the game was getting ready to see the sun.
Final look (with URP)
The time eventually came for the game’s demo release. We’d participated in a few events and contests, and were proud of what we’d created. At this stage, we decided to plan for a possible release to consoles, moving from HDRP to URP and trading crisp HD for an even more stylized aesthetic. We also added a subtle cold hue to the grayscale colors (yes, blue is back… but don’t tell anyone) for a more metallic feel, and polished everything even more. Making this switch meant that we had to reverse-engineer some HDRP features into URP, but we’re sure the effort was worth it.
Adding to the alien levels of the previous stage, I See Red now also had robot enemies, several bosses, storyline, QA, localization, and more “done.” It was time to push the big green button.
It certainly was a long journey with many challenges and changes along the way, not to mention years of work. We think it feels and looks amazing; and, if Reggie Fils-Aimé and others among the “most seasoned execs across the industry” say so, we must not be crazy. In any case, we made it and released it. But the question of how remained. Good news to all you technical art fans out there: It’s time to get technical. (Content warning: We went all out with the blood.)
Blood VFX
We spent a lot of time on blood because it is the main visual feedback you get when you hit an enemy or get hit in the game. This element needed to be clear and satisfying, and red is the most important color of the game, so there was no space for laziness.
We wanted to paint the world red with blood so we needed a strong contrast between the gray of the environments and the blood, as well as variations for decals. We could have used textures to mask the decals, but with the amount we needed it would end up being too repetitive. Of course, we didn't want that.
What we came up with was combining noise, the URP decal projector, and the world coordinates so that, depending on where we placed the decals, the shape would change. Using this technique, we made it so the width, height, edge smoothness, and blood roughness could all be changed with it animating smoothly. This comes in handy when we have to spawn, for example, a pool of blood under a defeated enemy.

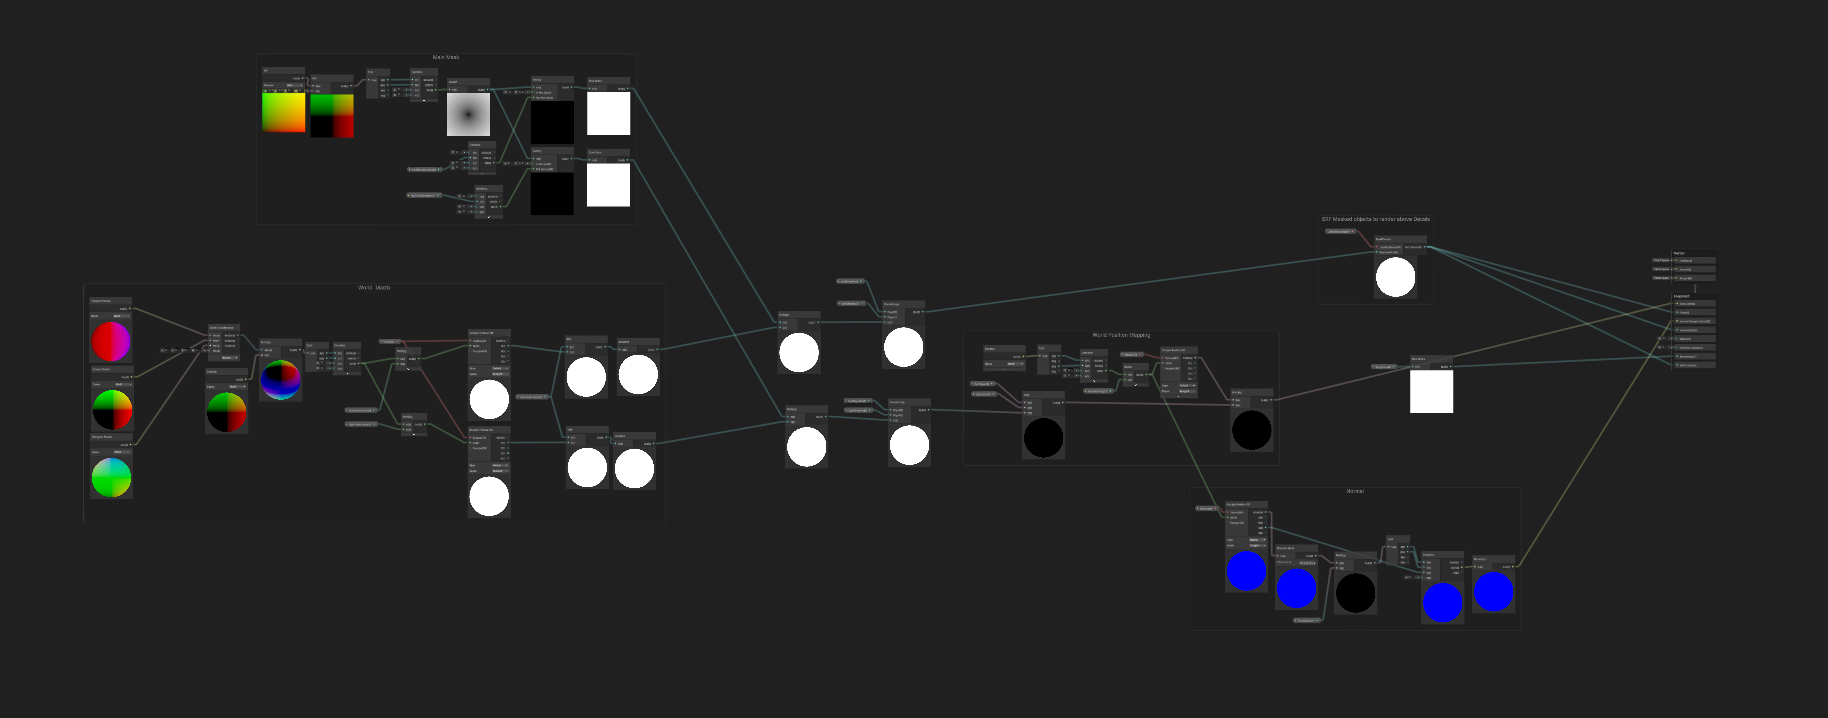
By changing the colors of the albedo and the properties of the noise masks, we could also generate different types of blood for aliens and robots, which have something that resembles oil. This wasn’t only to achieve an aesthetic difference between enemies. It was equally important from a gameplay perspective to know which blood is which, as players can acquire a passive ability through which they are able to “absorb” the blood left behind, with different effects: human blood is neutral, alien blood damages, and robot blood heals.
Apart from decals, there are also many blood particles used in I See Red. Think of the passive ability we just talked about: We needed a way to communicate the absorption to players. The result is, of course, the mini blood tornadoes.
These gnarly whirlwinds were achieved by using both a scrolling texture and a particle effect. The particle effect is a 3D-modeled ribbon (a stripe of polygons) plus a shader that scrolls the texture all the way up by using the main UV. Doing this, we were able to use the custom data from the particle system to change the speed, flow, and shape on the mesh, as well as add a fade in and out for the strips so the effect could appear and disappear smoothly at the top and bottom of the tornado. Take this, add some blood strings for extra juice, and you have a reverse blood tornado that absorbs blood into the player.
Speaking of particles, we can’t forget about on-hit particle effects when the player or enemies are damaged. These particles are spawned in the same frame as the blood pool/decal we talked about, with both animating for a seamless transition in through a code coroutine. They spawn in the direction that the bullet was going, generally opposite to the player.
Doing this through code proved really useful to personalize the effect, making it larger if the damage was greater, or if the enemy was closer, or even if the effect was close to a wall. We used raycasting to determine how long the decal and particles could be before clipping through a wall and what the inclination of the decal should be (if it needs to go on a wall, for example). We then passed those values to the animation, and the magic happened.
On-hit effects code snippet
public void Being.DropBlood(Vector3 hitPoint, Vector3 hitDirection, float sizeNormalized) // This is called when a creature (a “Being”) takes damage.
{
	int randomBloodParticleIndex = Random.Range(0, bloodParticles.Length);
	// Every Being has all the blood effects as children, and a random blood
        // child effect is selected on hit.

	bloodParticles[randomBloodParticleIndex].transform.forward = hitDirection;
	// We make the selected blood effect face the direction that the bullet or
        // impact was going.

	if (Physics.Raycast(bloodParticles[randomBloodParticleIndex].transform.position, hitDirection, out RaycastHit hitInfo, maxBloodParticlePossibleSizeDistance, obstacleMask, QueryTriggerInteraction.Ignore))
	{
		sizeNormalized = hitInfo.distance / maxBloodParticlePossibleSizeDistance;
		// We use a Raycast to attempt to find an obstacle, like a wall,
                // in the direction the blood effect will spawn. In case one is found,
                // to avoid clipping onto it, we shrink the effect based on the
                // distance to that obstacle.
	}
	else
	{
		sizeNormalized = Mathf.Clamp01(hitDamage / (maxHealth * maxDamagePercentageForMaxBloodParticleSize));
		// Otherwise, we set the size of the blood effect based on the
                // damage the Being took relative to its max health.
	}

	bloodParticles[randomBloodParticleIndex].Play(sizeNormalized);
}

public void BloodParticle.Play(float sizeNormalized)
{
	bloodParticleSystem.transform.localScale = Vector3.Lerp(startingScale * minSizeInPercentage, startingScale, sizeNormalized);
	bloodParticleSystem.Play();
	// Finally, we set the final size of the blood particle based on a minimum
        // and a maximum value, and play the effect!
}
That’s a lot of blood. A lot of red. Since the game uses a limited palette, we needed to ensure legibility is not lost in any aspect. The limitations of our signature look meant we had to get creative and use many tools and tricks. For instance, red things are not always red.
You might spot a door that has a red outline and glow but, once you step through it, goes gray. The same thing happens to enemies, which are red while they're hostile and gray once they’re… well, not hostile anymore. Via these signals, the game uses its distinctive color to communicate which things are of interest: unexplored areas, important objects, dangerous obstacles, and more. In a way, it’s as if the player had “detective vision” constantly on, and constantly updating to show only what's relevant in that moment.
But what if you don't see red the same way we do? What if someone who wants to play I See Red can’t perceive the differences between red and gray, as well? We certainly want everyone to be able to experience “the Rage,” which is the same reason I See Red is available in 13 languages. Surely, many of the speakers of those 13 languages would benefit from accessibility features. Enter our custom URP colorblind mode.
URP special colorblind mode
While making I See Red, we knew that a universe in black, white, and red might not be readable for everyone, so we came up with a solution for implementing different colorblind modes so everyone could play. The best way to make this was using the Scriptable Render features in Unity and a simple shader. The main idea behind this is to transform every value in the different channels using a sort of Look-Up Table inside the SRF that then translates those values into the shader for the final Render Pass. Because the effect needed to be executed as a final pass above every other object that was being rendered in the world, this pass is done after the UI renders and is the final pass in every frame in I See Red.
After investigating the different types of colorblindness and how we could use the Scriptable Render to cater to them by understanding how each person might perceive the colors in I See Red, we were able to create different modes to sharpen or modify the colors accordingly: Protanomaly, Protanopia, Deuteranomaly, Deuteranopia, Tritanomaly, Tritanopia, Achromatomaly, and Achromatopsia. Depending on who you’re asking, the game’s red may not look so red under these, but that’s ok by us: At the end of the day, what’s most important is that everyone can enjoy the game. There are many more systems in place to communicate all the rage you’ll need.
Finally, our blood is beautiful and for everyone… at least as long as they're over 14, 15, 16 or 17 years old, depending on where you live. But blood is certainly not all that makes up I See Red’s aesthetic. Let's not forget that red comes in many ways, shades, and forms, and so does gray.
Splatmap shader
We had to figure out a way of creating a color scheme that could adapt to new models without redoing the texture from scratch, which takes a lot of time. At this point, we must come clean: I See Red is not really black, white, and red, but actually red, green, and blue, like most other games. We lied at the beginning (sorry), but it still doesn’t quite look like most other games. This is because we used a custom Shader that applies a Splatmap, which is a texture that combines multiple grayscale textures or masks into one, using a different channel (red, green, blue, or alpha) per texture.
This allows us to have better control of the colors in-game by controlling each channel value individually inside the engine, and save resources by loading less textures. It also massively helps with iteration time.
There’s more?
We have blood. We have enemies. We have environments. We have the colors we need. It feels good. Next, we could talk about custom fogs, lighting and camera math, tone mapping, or that cool thing with the fake perspective on cutscenes…
Yes, a lot more could be said, but we'd be here for hours (and this takes time to write), so we might as well wrap it up. No more technical stuff. Just go and experience it: Play I See Red yourself and tell us if you spot anything connected to what we've talked about here. Last but not least, don't hesitate to contact us or the beautiful people at Unity if you want to know more.
Thanks for reading, until the next time!
You can download I See Red on Steam today. After playing, discover more stories from Made with Unity developers.
Is this article helpful for you?
Thank you for your feedback!
- Unity Labs
- Copyright © 2024 Unity Technologies