Understanding Unity’s serialization language, YAML


Did you know that you can edit any kind of asset without the hassle of dealing with serialization languages like XML or JSON in the Unity Editor? While this works most of the time, however, there are some instances where you must modify your files directly. Think of merge conflicts or files being corrupted as examples.
That’s why, in this blog post, we will further unpack Unity’s serialization system, and share use cases of what can be achieved by modifying Asset files directly.
As always, please back up your files, and ideally, use version control to prevent data loss. Manually modifying Asset files is a risky operation and is not supported by Unity. Asset files are not designed to be manually modified and won’t output helpful error messages to explain what happened if and when errors occur, making it difficult to fix bugs. By better understanding how Unity works and preparing to resolve merge conflicts, you can compensate for situations where the Asset Database API is not enough.
YAML structure
YAML, also known as “YAML Ain’t Markup Language,” is part of the family of human-readable data serialization languages like XML and JSON. But because it’s lightweight and relatively straightforward compared to other common languages, it’s considered easier to read.
Unity uses a high performance serialization library that implements a subset of the YAML specification. For instance, blank lines, comments, and some other syntax supported in YAML are not supported in Unity files. In certain edge cases, the Unity format diverges from the YAML specification.
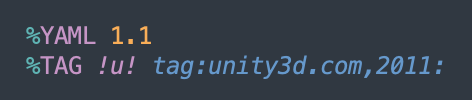
Let’s explore this by looking at a snippet of YAML code in a Cube Prefab. First, create a default cube in Unity, convert it to a Prefab, and open the Prefab file in any text editor. As you can see in Figure 1, the first two lines are headers that won’t be repeated later on. The first one defines which YAML version you’re using, whereas the second creates a macro called “!u!” for the URI prefix “tag:unity3d.com,2011:” (discussed below).

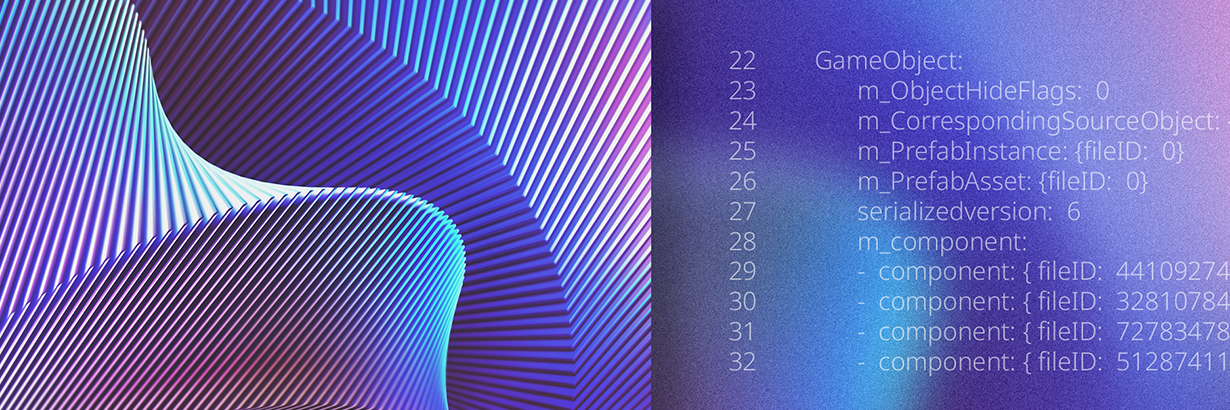
Following the headers, you will encounter a series of object definitions, like GameObjects in a Prefab or scene, the components of each GameObject, and possibly other objects like Lightmap settings for scenes.

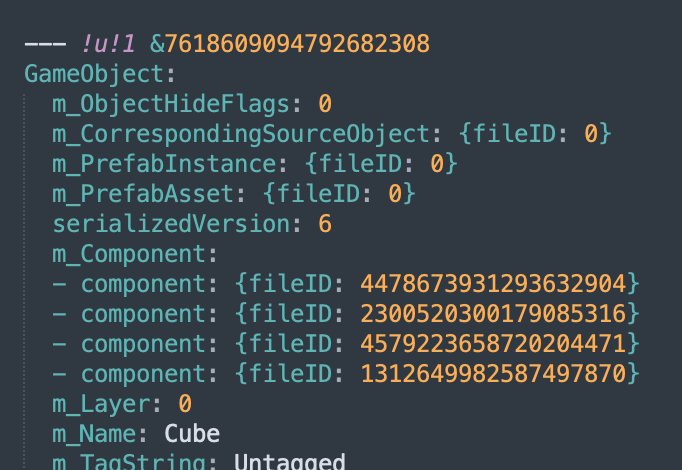
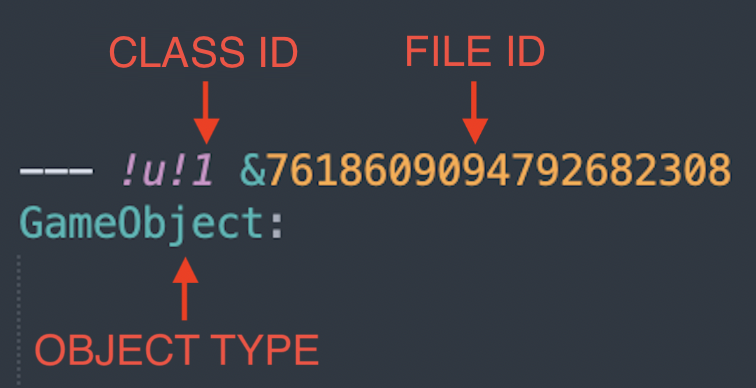
Each object definition starts with a two-line header, such as the one in our example for Figure 2: “--- !u!1 &7618609094792682308” follows the format “--- !u!{CLASS ID} &{FILE ID}” which can be analyzed in two parts:
- !u!{CLASS ID}: This tells Unity which class the object belongs to. The “!u!” part will be replaced with the previously defined macro, leaving us with “tag:unity3d.com,2011:1” – the number 1 referring to the GameObject ID in this case. Each Class ID is defined in Unity’s source code, but a full list of them can be found here.
- &{FILE ID}: This part defines the ID for the object itself, which is used to reference objects between each other. It’s called File ID because it represents the ID of the object in a specific file. Read on for more information on cross-file references later in this post.
The second object’s header line is the name of the object type (here, GameObject), which allows you to identify it by reading the file.

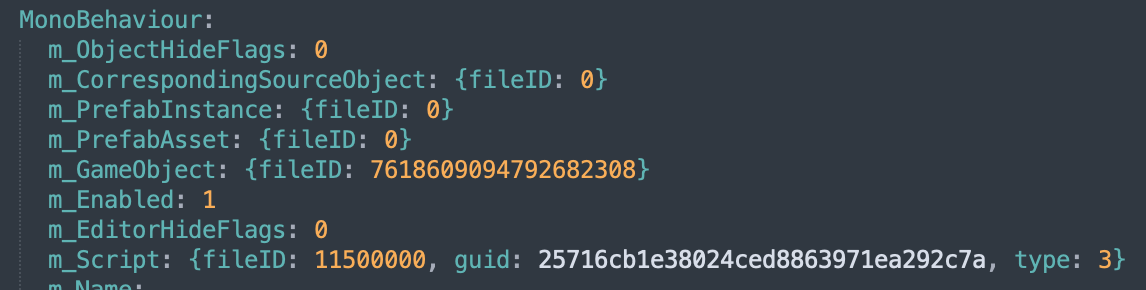
After the object header, you can find all of the serialized properties. In our GameObject example above, Figure 2 provides details like its name (m_Name: Cube) and layer (m_Layer: 0). In the case of MonoBehaviour serialization, you’ll notice the public fields and the private ones with the SerializeField attribute. This format is similarly used for ScriptableObjects, Animations, Materials, and so on. Please note that ScriptableObjects use MonoBehaviour as their object type, instead of defining their own. That’s because the same internal MonoBehaviour class hosts them as well.
Quick refactoring with YAML
With what we’ve covered so far, you can start to leverage the power of modifying YAML for purposes such as refactoring animation tracks.
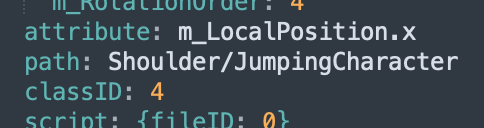
Unity’s animation files work by describing a set of tracks or Animation Curves; one for each property you want to animate. As shown in Figure 4, an Animation Curve identifies the object it needs to animate through the path’s property, which contains the names of the child GameObjects up to the specific one. In this example, we’re animating a GameObject called “JumpingCharacter” – a child of the “Shoulder” GameObject, which is a child of the GameObject that has the Animator component playing this animation. To apply the same animation to different objects, the animation system uses string-based paths instead of GameObject IDs.

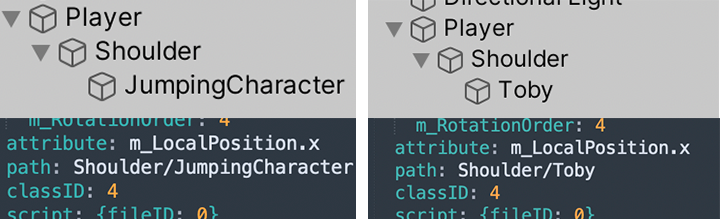
Renaming an animated object in the hierarchy can lead to one very common issue: The curve might lose track of it. While this is usually resolved by renaming each animation track in the Animation window, there are cases where several animations with several curves are applied to the same object, making it a slow and error-prone process. Instead, YAML editing enables you to correct several Animation Curve paths in one shot using a classic “search and replace” operation on the animation files with the text editor you are most familiar with.

Local references
As previously mentioned, each object in a YAML file has an ID known as “File ID.” This ID is unique for each object inside the file, and serves to resolve references between them. Think of a GameObject and its components, the components and its GameObject, or even script references, like a “Weapon” component reference to a “SpawnPoint” GameObject in the same Prefab.
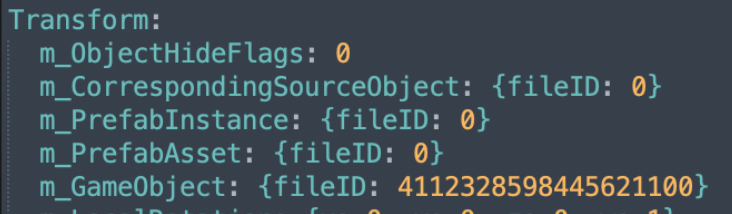
The YAML format for this is “{fileID: FILE ID}” as the value of the property. In Figure 6, you can see how this Transform belongs to a GameObject with the ID 4112328598445621100, given that its “m_GameObject” property references it through the File ID. You can also observe examples of null references like “m_PrefabInstance” (given that its File ID is zero). Keep reading for more on Prefab instances.

Let’s consider the case of reparenting objects inside a Prefab. You can change the File ID of the “m_Father” property of a Transform with the File ID of the new target Transform, and even correct the old parent Transform YAML to remove this object from its “m_Children” array, and add it to the new parent “m_Children” property.

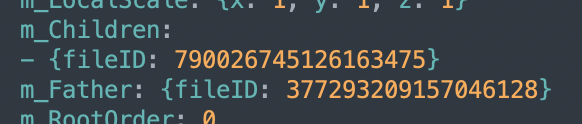
To find a specific Transform by name, you must primarily determine its GameObject File ID by searching the one with the m_Name you are looking for. Only then can you locate the Transform whose m_GameObject property references that File ID.
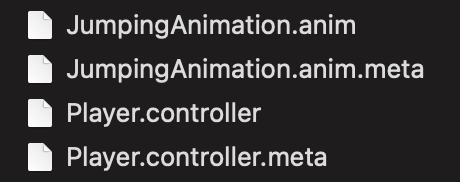
Meta files and cross-file references
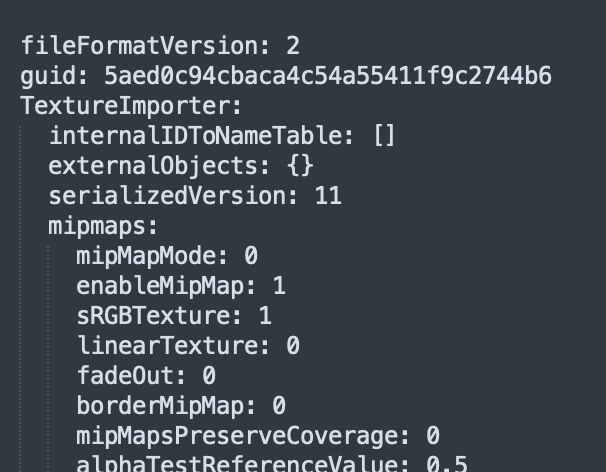
When referencing objects outside this file, like a “Weapon” script referencing a “Bullet” Prefab, things get a little more complex. Remember that the File ID is local to the file, meaning it can be repeated in different files. In order to uniquely identify an object in another file, we need an additional ID or “GUID” that identifies the whole file instead of individual objects inside of it. Each asset has this GUID property defined in its meta file, which can be found in the same folder as the original file, with the exact same name plus a “.meta” extension added.

For non-Unity native file formats, like PNG images or FBX files, Unity serializes extra Import settings for them in the meta files, such as the maximum resolution and compression format of a texture, or the scale factor of a 3D model. This is done to save extended file properties separately, and conveniently version them in just about any version control software. But aside from these settings, Unity will also save general Asset settings in the meta file, like the GUID (“GUID” property) or Asset Bundle (“assetBundleName” property), even for folders or Unity’s native format files like Materials.

With this in mind, you can uniquely identify an object by combining the GUID in the meta file and the File ID of the object inside the YAML, as shown in Figure 10. More specifically, you can see that YAML generated the “bulletPrefab” variable of a Weapon script, which references the root GameObject with the File ID 4551470971191240028 of the Prefab with the GUID afa5a3def08334b95acd2d70ee44a7c2.


You can also see a third attribute called “Type.” Type is used to determine whether the file should be loaded from the Assets folder or the Library folder. Note that it only supports the following values, starting at 2 (given that 0 and 1 are deprecated):
- Type 2: Assets that can be loaded directly from the Assets folder by the Editor, like Materials and .asset files
- Type 3: Assets that have been processed and written in the Library folder, and loaded from there by the Editor, like Prefabs, textures, and 3D models
Another factor to highlight regarding script serialization is that the YAML Type is the same for every script; just MonoBehaviour. The actual script is referenced in the “m_Script” property, using the GUID of the script’s meta file. With this, you can observe how each script is treated, just as an asset.

Use cases for this scenario include, but are not limited to:
- Finding all the usages of an asset by searching the asset’s GUID in all other assets
- Replacing all usages of that asset with another asset GUID in the whole project
- Replacing one asset with another that has a different extension (i.e., replacing an MP3 file with a WAV file) by deleting the original asset, naming the new one exactly the same with the new extension, and renaming the meta file of the original asset with the new extension
- Fixing lost references when deleting and re-adding the same asset by changing the GUID of the new version with the old version GUID
Prefab instances, Nested Prefabs, and Variants
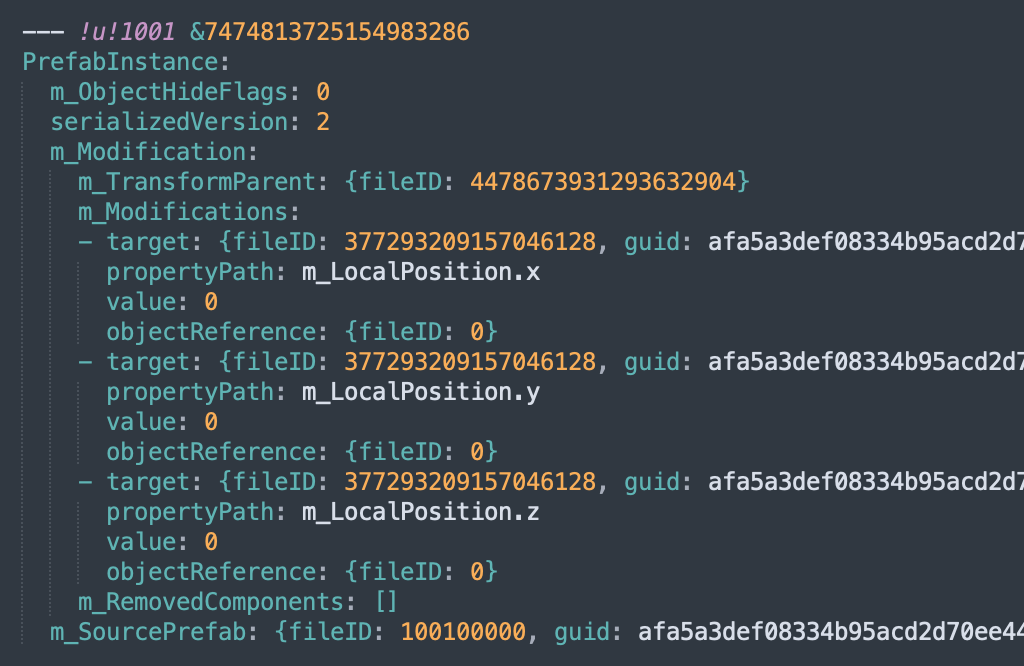
When using Prefab instances in a scene, or Nested Prefabs inside another Prefab, the Prefab GameObjects and components are not serialized in the Prefab that uses them, but rather, a PrefabInstance object is added. As you can see in Figure 12, the PrefabInstance has two key properties: “m_SourcePrefab” and “m_Modifications.”

As you might have noticed, “m_SourcePrefab” is a reference to the Nested Prefab Asset. Now, if you search its File ID in the Nested Prefab Asset, you won’t find it. In this case, “100100000” is the File ID of an object created during the import of the Prefab, called Prefab Asset Handle, which won’t exist in the YAML.
Additionally, “m_Modifications” comprises a set of modifications or “overrides” made to the original Prefab. In Figure 12, we override the X, Y, and Z axes of the original local position of a Transform inside the Nested Prefab, which can be identified via its File ID in the target property. Note that Figure 12 above has been shortened for readability. A real PrefabInstance will typically have more entries in the m_Modifications section.
Now, you might be wondering, if we don’t have the Nested Prefab objects in our outer Prefab, how do we reference objects in the Nested Prefabs? For such scenarios, Unity creates a “placeholder” object in the Prefab that references the proper object in the Nested Prefab. These placeholder objects are marked with the “stripped” tag, which means they are simplified with only the properties needed to act as placeholder objects.

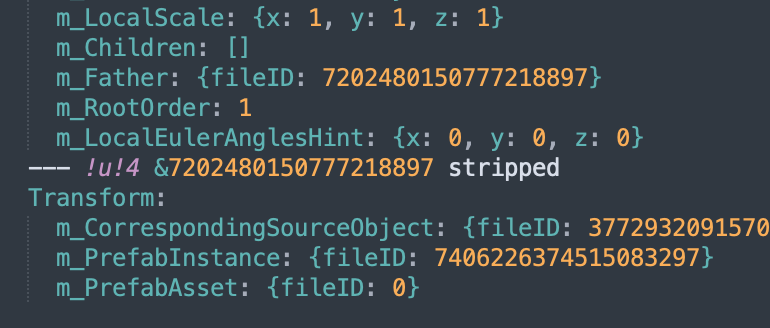
Figure 13 similarly shows how we have a Transform marked with the “stripped” tag, which doesn’t have the usual properties of a Transform (like “m_LocalPosition”). Instead, it has the “m_CorrespondingSourcePrefab” and “m_PrefabInstance” properties filled in a way that references the Nested Prefab Asset and the PrefabInstance object in the file it belongs to. Above it, you can see part of another transform whose “m_Father” references this placeholder Transform, making that GameObject a child of the Nested Prefab object. As you start referencing more objects in the Nested Prefabs, more of these placeholder objects will be added to the YAML.
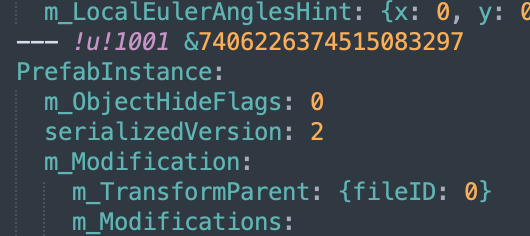
Conveniently, there’s no difference when it comes to Prefab Variants. The base Prefab of a Variant is just a PrefabInstance with a Transform that has no parent, meaning it is the root object of the Variant. In Figure 14, you can see that the “m_TransformParent” property of the PrefabInstance references “fileID: 0.” This means it doesn’t have a father, making it the root object.

While you can use this knowledge to replace a Nested Prefab or the base Prefab of a Variant with another one, this kind of modification can be risky. Proceed with caution and have a backup just in case.
Begin by replacing all the references to the GUID of the current base Prefab with the GUID of the new one, both in the PrefabInstance object and the placeholder objects. Be sure to take note of the placeholder objects’ File IDs. Their “m_CorrespondingSourceObject” properties not only reference the asset, but the objects inside of it via their File IDs. It’s very likely that the objects’ File IDs in the current Prefab will differ from those in the new Prefab – and if you don’t fix them, you will lose overrides, references, objects, and other data.
As you can see, changing a base or Nested Prefab is not as straightforward as one might think. That’s one of the main reasons it’s not natively supported in-Editor.
Stale references
There are several scenarios where stale objects and references could be left in YAML; one classic case would be removing variables in scripts. If you add a Weapon script to the Player Prefab, you’d have to set the Bullet Prefab reference to an existing Prefab, and then remove the Bullet Prefab variable from the Weapon script. Unless you change and save the Player Prefab again, re-serializing it in the process, the bullet reference will be left in YAML. Another example centers on placeholder objects of Nested Prefabs that are not removed when the object is deleted from the original Prefab, which again, could be fixed by changing and saving the Prefab. Finally, re-serialization of assets could be forced via scripting with the AssetDatabase.ForceReserializeAssets API.
But why doesn’t Unity automatically prune stale references in the scenarios listed above? This is primarily due to performance; to prevent re-serializing all the assets every time you change one script or base Prefab. Another reason is to prevent data loss. Let’s say you mistakenly remove a script property (such as Bullet Prefab) and want to recover it. You only need to revert the change on your script. So long as you have a variable with the same name as the removed one, your changes won’t be lost. The same thing would happen if you delete the referenced Bullet Prefab. If you recover the Prefab exactly as it was, including the meta file, the reference will be preserved.
This is not normally an issue during runtime, given that when Unity builds the Player or Addressables, these stale objects and references become cleared. But even then, there are some cases where stale references can cause issues – namely, using pure Asset Bundles. The Asset Bundle dependency calculation considers stale references, which might create unnecessary dependencies between bundles, loading more than required at runtime. This is worth thinking about when using Asset Bundles. Create or use any existing tool to prune unnecessary references.
Conclusion
Although you can completely ignore YAML most of the time, grasping it is useful for understanding Unity’s serialization system. While facing large refactors and reading or modifying the YAML directly with asset processing tools can be fast and effective, looking for solutions based on the Unity Asset Database API is highly recommended whenever possible. It is also particularly helpful for solving merge issues in version control. We recommend that you explore the Smart Merge tool, which can automatically merge conflicting Prefabs, and read more on YAML in our official documentation.
Is this article helpful for you?
Thank you for your feedback!
- Unity Labs
- Copyright © 2024 Unity Technologies