Adam - Step by Step


When we showed the Adam demo for the first time at GDC last year, everyone was blown away by the look and quality achieved with Unity. But soon, on everyone’s lips, including my hairy ones, was the question: “How did they do it?”. So I decided to prepare a live demo explaining how to recreate one entire scene of Adam from an empty scene.
I gave this talk at Unite Los Angeles 2016, which you can watch below, and this blog post gives most details about it.:
Assets
The first question I asked myself, was what do the assets look like in normal conditions. At the time I was working with the internal repository, while the Demo team was hard at work to release some nicely wrapped up asset packages containing indoor and outdoor environments and characters which would allow anyone to play around with Adam assets.
Clearly, when put in a new empty project, the raw assets did not look as in the Adam demo! The project had to be first setup the proper way (deferred rendering, linear rendering, HDR camera) and some reflection probes added to get the “real material feeling”. This was a good lesson on how to work collaboratively with PBR assets, the importance of cross-industry compatible materials, and how key is lookdev tools in this process.
In these conditions one could finally really appreciate the quality of the assets creation and their design.


VFX
Adam’s look is the combination of all visual effects used, from nice particle effects, to vertex cache animation, baked physical simulation and an entire custom volumetric fog and lighting system. Demo team’s VFX Artist Zdravko Pavlov explains in detail his work process in the dedicated blogpost about VFX in Adam. The great news was that by Unite LA time, most of these systems were already publicly available:
- The particle effects used the built-in version of Shuriken and make intense use of flipbooks. The image sequences for the fog were created with Chaos Group’s Phoenix FD plugin for 3DS Max and rendered with V-Ray. Initially they were put together in Adobe After Effects, but as of Unite LA, the VFX toolbox developed by our internal VFX artist was made available and open source. It allows a much easier management and processing of the image sequences. We also recently released a package of ready-to-use fires, smokes, and explosions sequences!
- The alembic plugin used in Adam to replay the cloth ripping simulation is available and open source as well. Unity Japan who developed it is now working on a USD importer/exporter also open source.


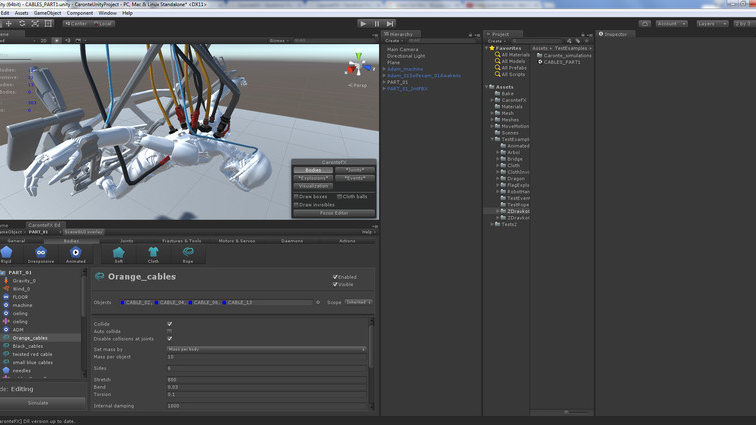
- Wires, cloth, and fractures requiring complex and high fidelity physical simulations were realised thanks to the CaronteFX plugin on the Asset Store. Sebastian’s character package contains a CaronteFX player showing how this baked simulation runs on his clothing.

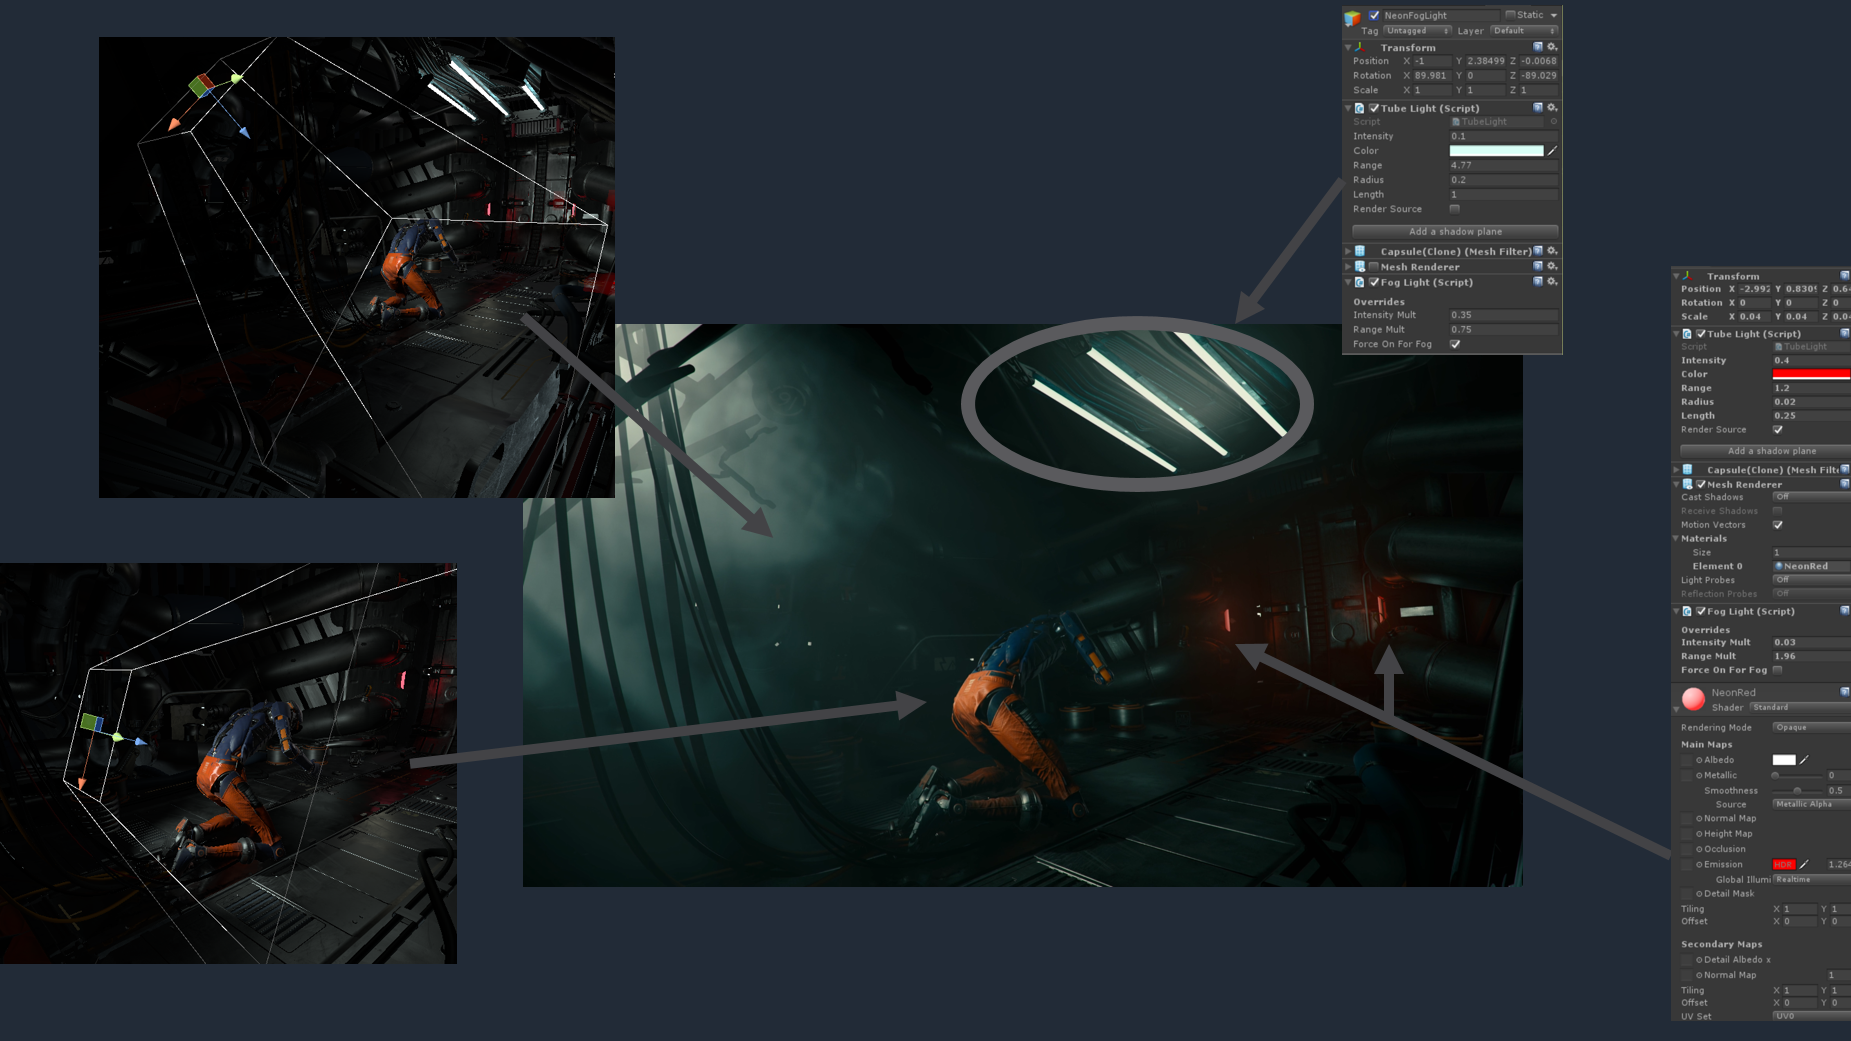
- The volumetric lighting package, developed for “Adam” by Demo team’s GFX programmer Robert Cupisz, is now publicly available. It includes fog lights, soft shadows and volumetric shadows, noise and wind simulation that makes most of the indoor scene atmosphere. More details about it can be found in Robert’s talk at Unite Europe 2016.
Lighting
The lighting is probably what is the most specific to a short versus a classic game. Just like in a movie, when doing a cinematic sequence, the lighting artist can light each shot in his own way, placing lights to get the best shadows and highlights for this camera angle in particular. In my talk I wanted to show and explain how the lights were placed in one of the shots. Some shots can utilize many lights to get nice lighting on the walls, arms, hands, face, eyes, back of the head, chest, body shadows, etc.
The lighting is particularly improved in Adam thanks to the new real time area light technology presented by Unity at Siggraph 2016. Our demo team made the first implementation of this research and used it in production. Working with a light which does not come from a point, but from a surface, produces much more realistic results. Apart from the most obvious - sharp specular highlights having the proper rectangular shape as the light source, there’s also a more subtle, yet arguably more important effect. That effect comes from replacing point lights, which don’t exist in real world and we’re not used to seeing materials affected by them, with area lights producing a much more familiar material response, increasing perceived image quality. Combined with the PCSS soft shadows, volumetric shadows, tube lights and fog lighting from the volumetric lighting package, I could recreate the exact same scene as presented in Adam in a few minutes.

Post processing
Finally, just like any movie production, compositing and camera effects are the heart of cinematography. During Adam production, the team had to deal with various effects from various sources (standard assets, cinematic effects, Keijiro’s effects, asset store, custom TAA with an alpha version of Unity supporting motion vectors...) to get the final result. The Demo team also developed its own tone mapping and color grading effect, as well as motion blur.
Moreover, the right order and the right effect setup had to be mixed to achieve good result.
Explaining all this would have taken an entire talk (which I did a few weeks before!).
But fortunately, we released a new post processing stack, assembling together most of the needed effects with latest improvements (eg: HDR color grading) and in an artist friendly way. In a few clicks one can enable temporal anti-aliasing which gives this very sharp image in the Adam demo, motion blur and depth of field to get the feeling that it was shot through a real camera, and tone mapping and color grading to get the cinema look.
On top of that, grouping effects together allowed to use minimal number of passes and hence great gain of performances... so that it could all run on my MacBook Pro 2014!


Conclusion
What used to require a lot of additional work and features from various sources at the time when the Adam demo was originally produced, is now possible for anyone to achieve with only publicly available assets and Unity 5.4.1.
What I did not have time to show, was how to make all this come together as one big sequence and export it as a video. First, most animations for characters and cameras came from motion capture and camera tracking. So for my talk I decided to take advantage of the publicly released characters being Humanoid to do the character layouting using Inverse Kinematics in Editor. Second, at Unite LA, our sequencer (Timeline) was still in private alpha, but will available publicly in the coming weeks.
I hope to make a full cinematic talk one day, to inspire more people to make films and cinematics with Unity. “Creating a short film from an empty scene in one hour”. Maybe another talk for one of the 2017 Unites!
Is this article helpful for you?
Thank you for your feedback!
- Unity Labs
- Copyright © 2024 Unity Technologies